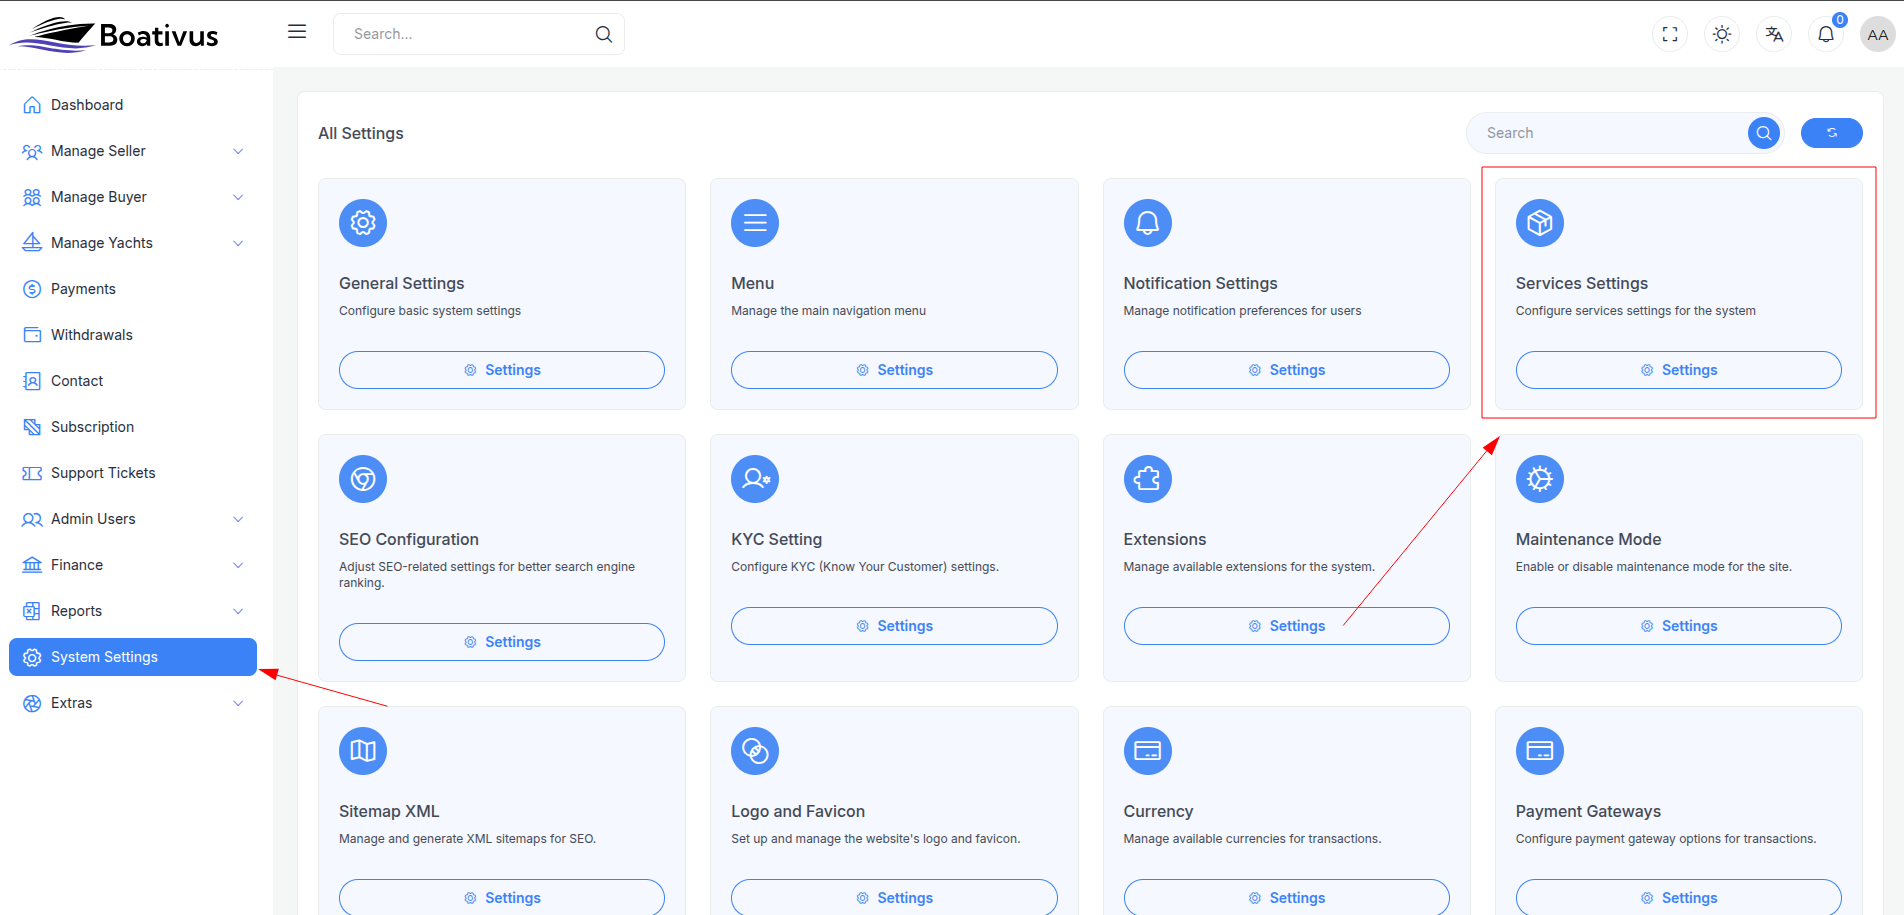
Service Settings
Go the system setting an select Service Settings on the list view the click, it will redirect to Service Settings edit page.
You can update currency layer and map box api key by this page.

How can you get the currency layer api key and map box api key?
follow the steps below:
How to Get an API Key from Currencylayer
This guide provides step-by-step instructions to sign up for a Currencylayer account and obtain an API key for accessing currency exchange rate data.
Prerequisites
- A valid email address
- Internet access
- A web browser
Steps
Step 1: Visit the Currencylayer Website
- Open your web browser.
- Go to https://currencylayer.com.
Step 2: Sign Up for a Free Account
- On the homepage, click Sign Up Free (usually in the top-right corner or center).
- Fill out the registration form:
- First Name
- Last Name
- Email Address
- Password
- Agree to the Terms of Service and Privacy Policy.
- Click Create Free Account.
Step 3: Verify Your Email Address
- Check your inbox for a confirmation email from Currencylayer (check spam/junk if not found).
- Click the Verify Email link in the email.
- You’ll be redirected to the website, confirming email verification.
Step 4: Log In to Your Account
- Go to https://currencylayer.com.
- Click Log In (top-right corner).
- Enter your email and password.
- Click Log In to access your dashboard.
Step 5: Retrieve Your API Key
- In the Account Dashboard, find the Your API Access Key section.
- Copy the alphanumeric API key (e.g.,
a1b2c3d4e5f6g7h8i9j0) displayed.
Step 6: Add the API Key to Your Application dashboard

How to Get a Mapbox Access Token
This guide provides step-by-step instructions to sign up for a Mapbox account and obtain an access token for accessing Mapbox APIs and services, such as interactive maps, geocoding, and navigation.
Prerequisites
- A valid email address
- Internet access
- A web browser
- (Optional) A credit card for account verification (required for free plan in some regions)
Steps
Step 1: Visit the Mapbox Website
- Open your web browser.
- Navigate to the official Mapbox website at https://www.mapbox.com.
Step 2: Sign Up for a Free Account
- On the Mapbox homepage, click Get started for free or Sign Up (typically in the top-right corner or center).
- Fill out the registration form with the following details:
- Email Address: Provide a valid email address.
- Password: Create a secure password.
- First Name (optional): Enter your first name.
- Last Name (optional): Enter your last name.
- Agree to the Terms of Service and Privacy Policy.
- Click Create Account or the equivalent button.
- In some regions, you may be prompted to add a credit card for account verification, even for the free plan. Follow the on-screen instructions to complete this step.
Step 3: Verify Your Email Address
- After submitting the form, Mapbox will send a confirmation email to the provided email address.
- Check your inbox (and spam/junk folder, if necessary) for an email from Mapbox.
- Click the Verify Email link in the email to confirm your account.
- You’ll be redirected to the Mapbox website, confirming email verification.
Step 4: Log In to Your Mapbox Account
- Go to https://www.mapbox.com.
- Click Log In (top-right corner).
- Enter your email address and password.
- Click Log In to access your account dashboard.
Step 5: Access Your Default Public Token
- Once logged in, you’ll be directed to your Account Dashboard.
- Navigate to the Access Tokens page by:
- Clicking Account in the top-right corner, then selecting Access Tokens, or
- Going directly to https://account.mapbox.com/access-tokens/.
- Your Default Public Token (starting with
pk.) will be displayed on the right side of the page or at the top of the Access Tokens list. - Click the Copy button next to the token to copy it to your clipboard for use in your application.
Step 6: Create a New Access Token (Recommended)
- The default public token is suitable for testing but not recommended for production due to limited security features (e.g., no URL restrictions). To create a new token:
- On the Access Tokens page, click Create a token.
- Fill out the token creation form:
- Token Name: Enter a descriptive name (e.g., “MyProjectMapToken”).
- Public Scopes: Select the necessary scopes (permissions) for your application (e.g.,
styles:read,fonts:readfor displaying maps). Only select scopes required for your use case to enhance security. - Secret Scopes (optional): If needed for server-side operations (e.g.,
uploads:write), check the relevant boxes. Note that secret tokens (starting withsk.) are displayed only once, so store them securely. - URLs (optional): Add specific URLs (e.g.,
https://www.mywebsite.com) to restrict token usage to those domains for added security. Click Add URL to include multiple URLs.
- Click Create Token.
- Enter your account password to confirm.
- The new token will appear on the Access Tokens page. Click the Copy button to copy it. For secret tokens, save it immediately in a secure location (e.g., password manager), as it won’t be displayed again.
Step 7: Add the Access Token to Your Application dashboard
