Guide to Install Our Laravel on cPanel
This guide will help you install our Laravel on cPanel. You can use this guide to install our Laravel on cPanel. If you have any questions, please contact our support team.
Prerequisites
Before you start, make sure you have the following installed on your cPanel:
- Server with php version 8.2 or higher
- all extensions are enabled
- Server ram at least 1GB or higher recommended 2GB
- Server disk at least 2GB or higher recommended 4GB
Step 1: Upload the Files
-
Extract the Botivus Project that you have downloaded from CodeCanyon.
-
On that folder you will find 2 folder documentation and core folder.
-
Zip the core folder and upload it to your cPanel.
Step 2: Upload Process
-
Login to your cPanel.
-
Navigate to the Files Manager section.
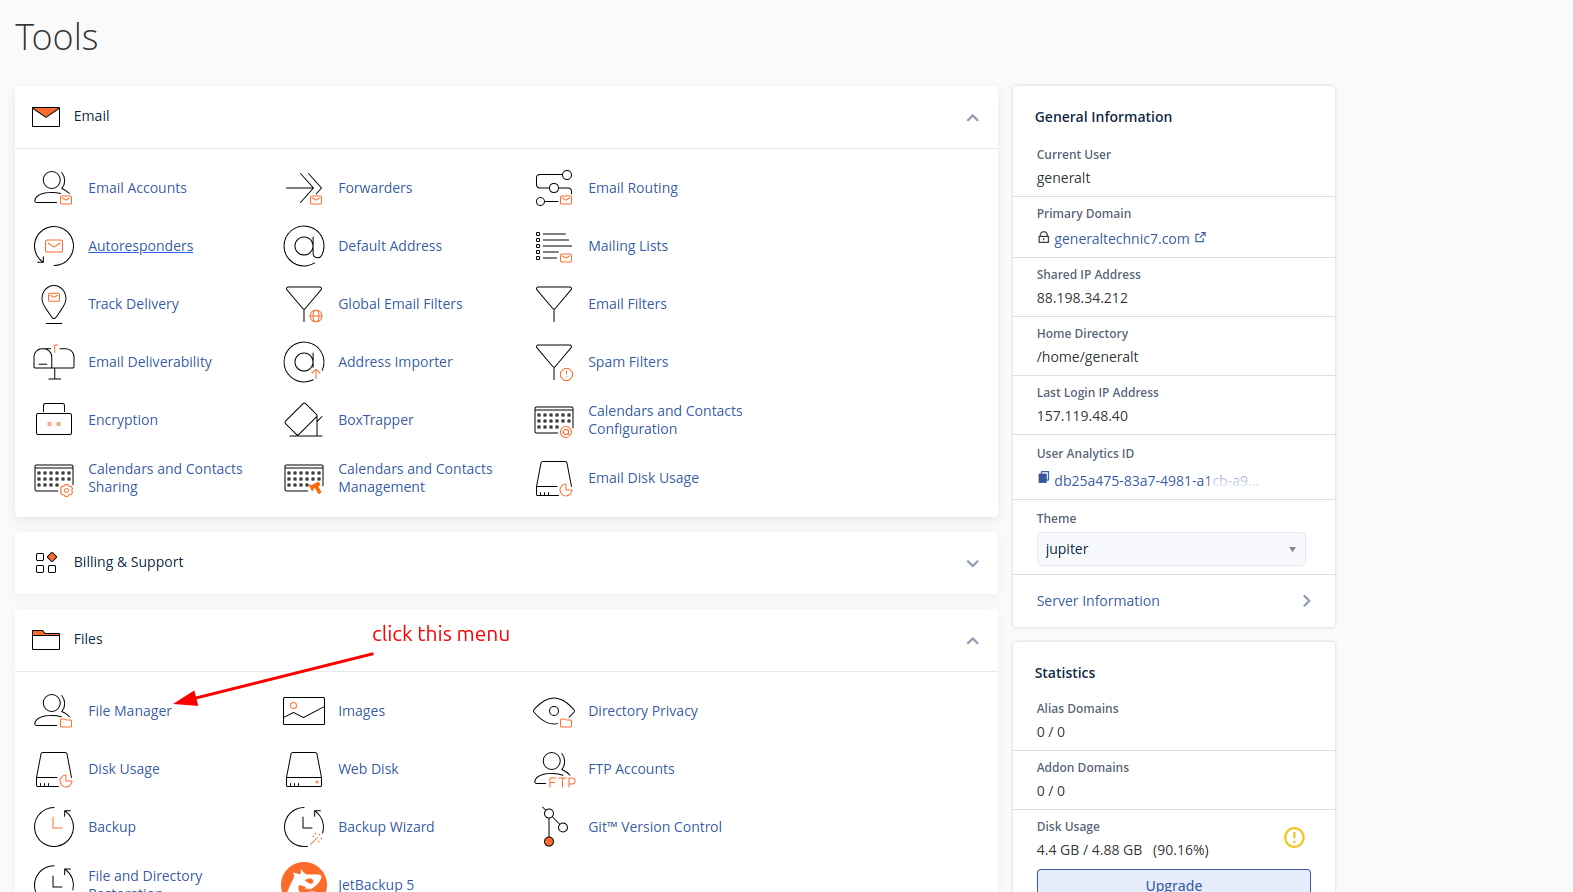
- Select public_html folder.

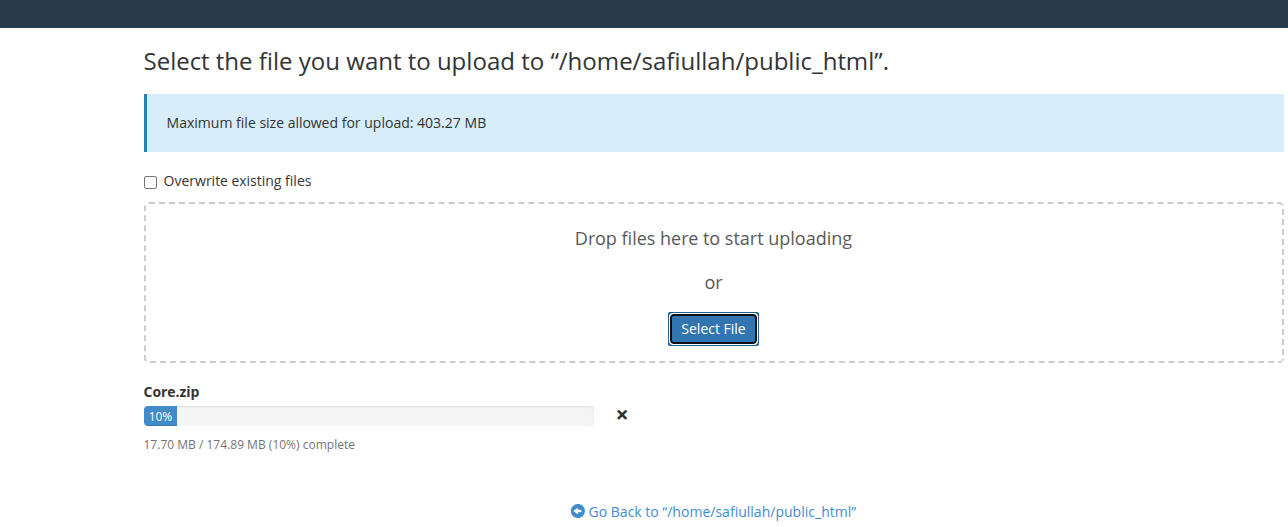
- Upload the zip file to the public_html folder. for example: /public_html/core.zip
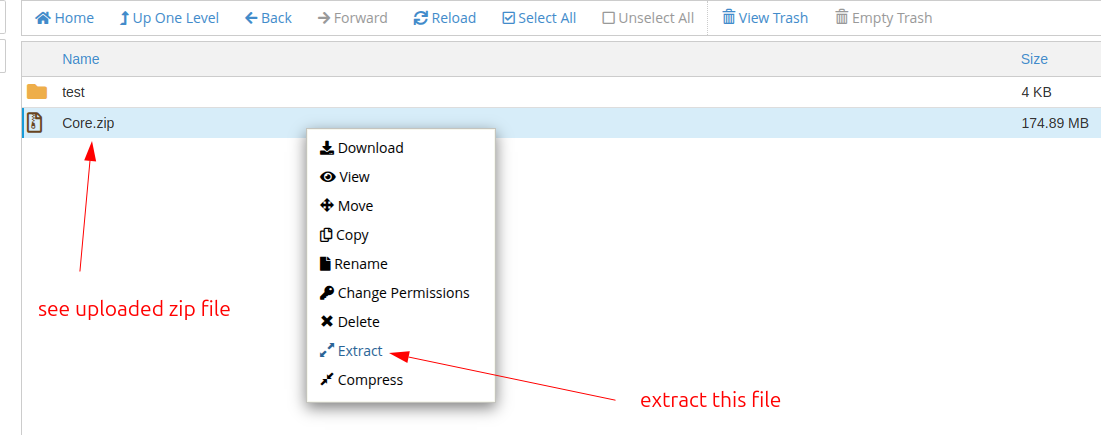
- Extract the zip file.
Step 3: Setup MySQL
- Go to the MySQL section of your cPanel.
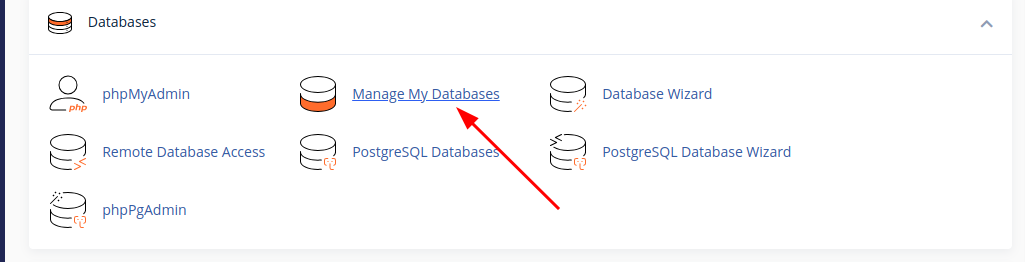
- Click on the "Manage My Databases" button.
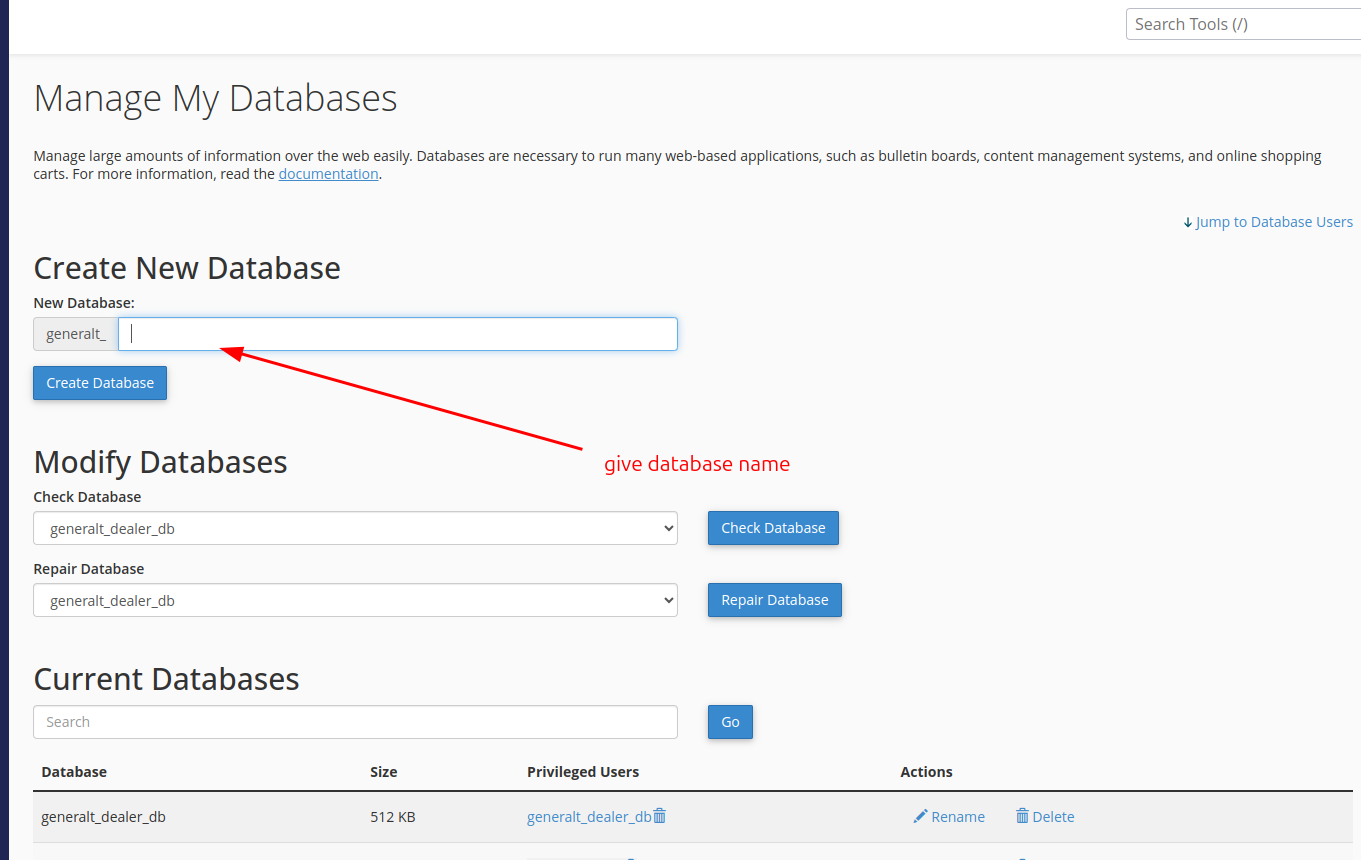
-
Enter the database name then click on the "Create Database" button.
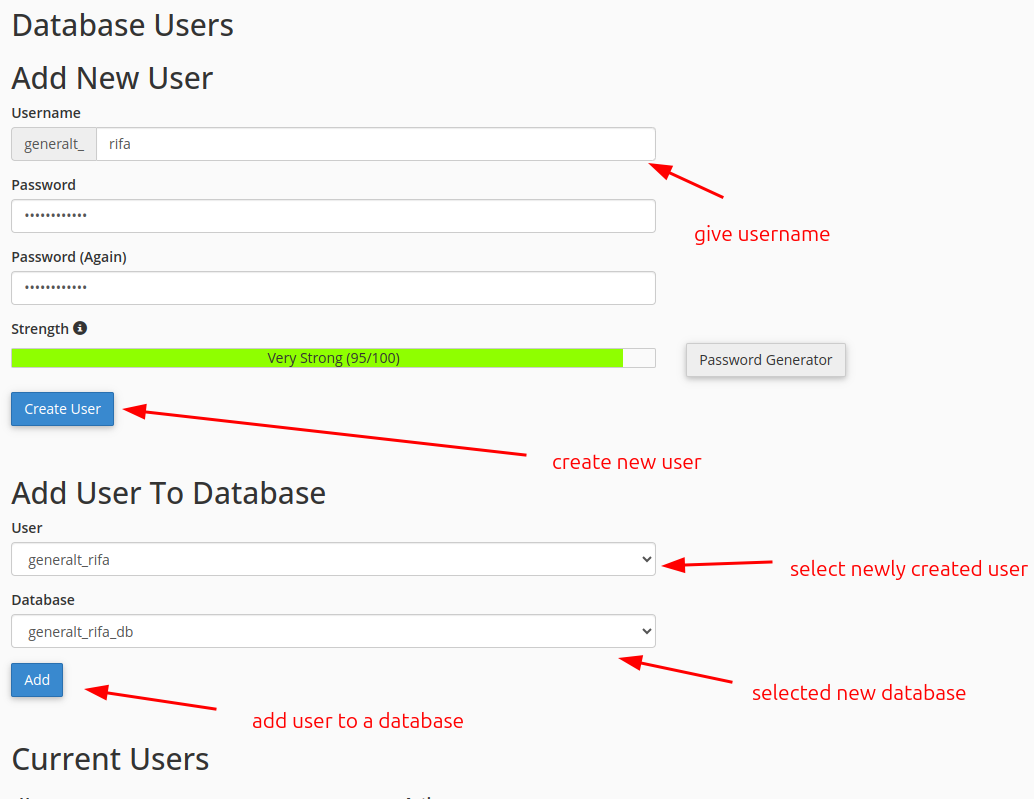
-
Create an user for the database. Then add this user to the database.
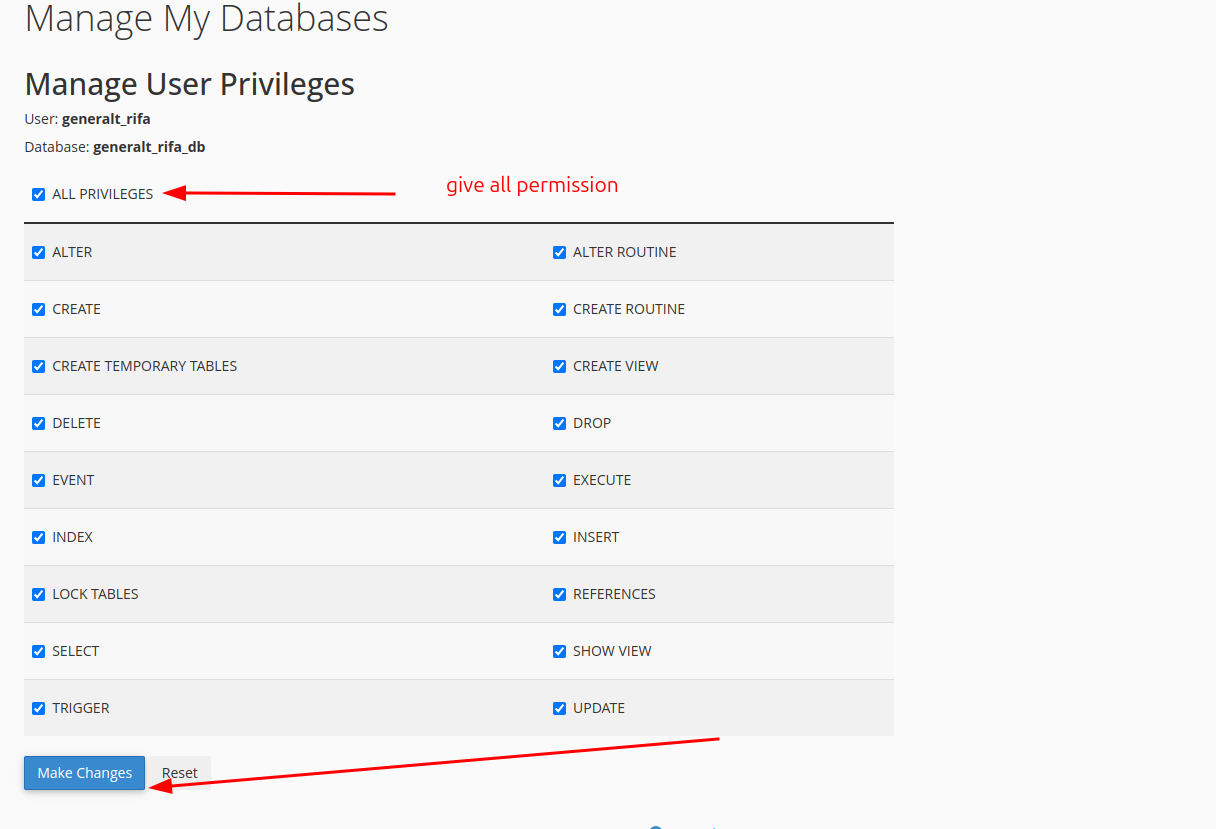
- Now Manage user privileges select all the privileges and click make changes.
Step 4: Graphical User Interface (GUI) Installation
- Now access you domain name on your browser, then you can see the graphical user interface for the installation.
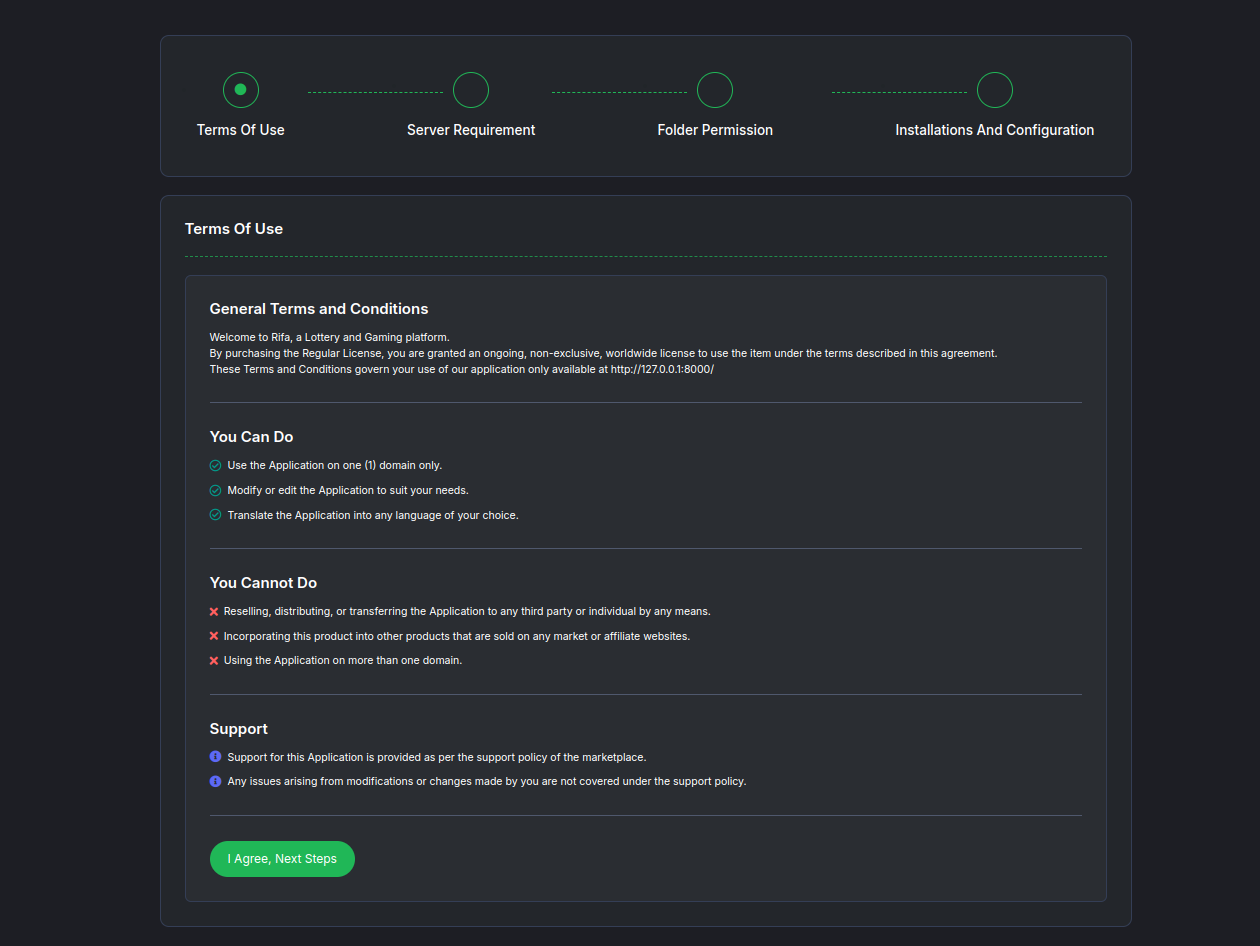
-
Agree with the terms and conditions and click "I Agree, Next Step" button.
-
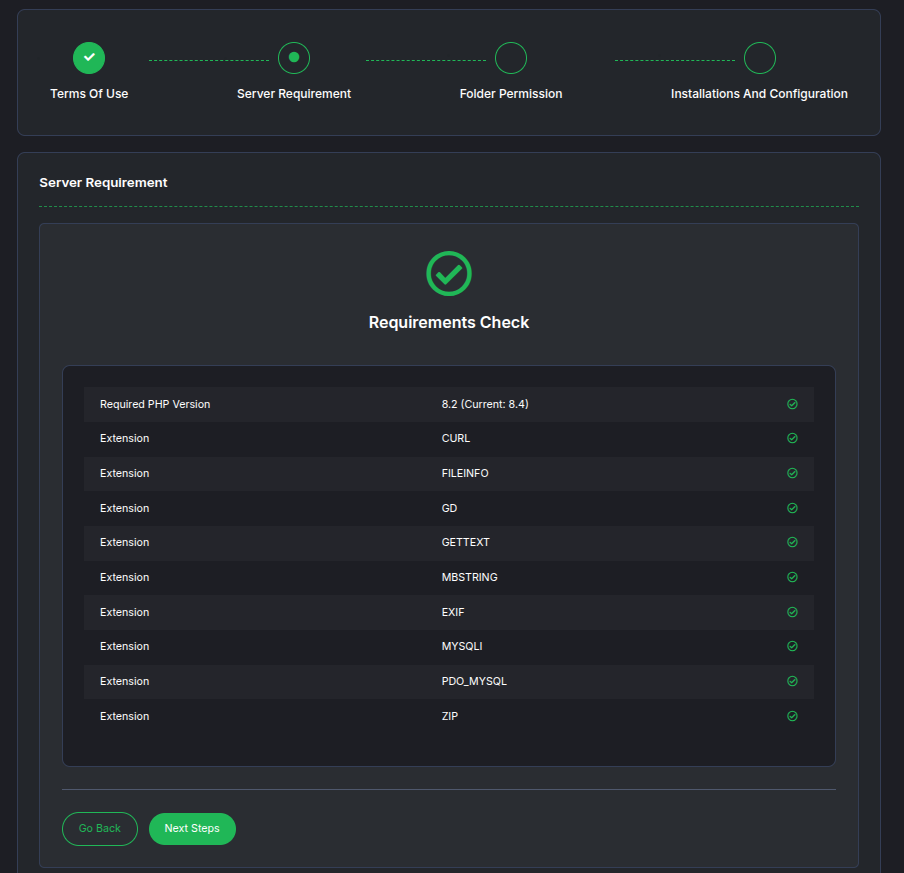
Now you can see the server requirements. If all the requirements are met then click "Next Step" button.
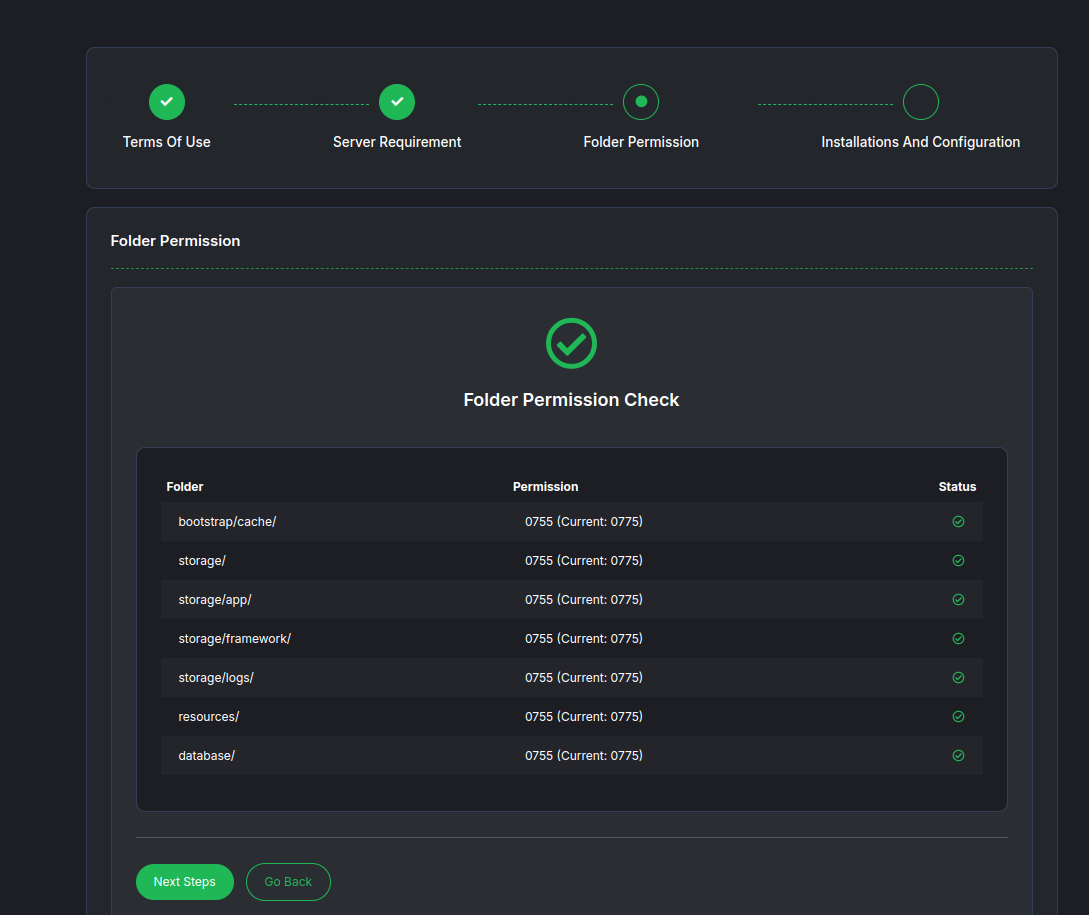
- Now check all the required folder permissions is met then click "Next Step" button.
-
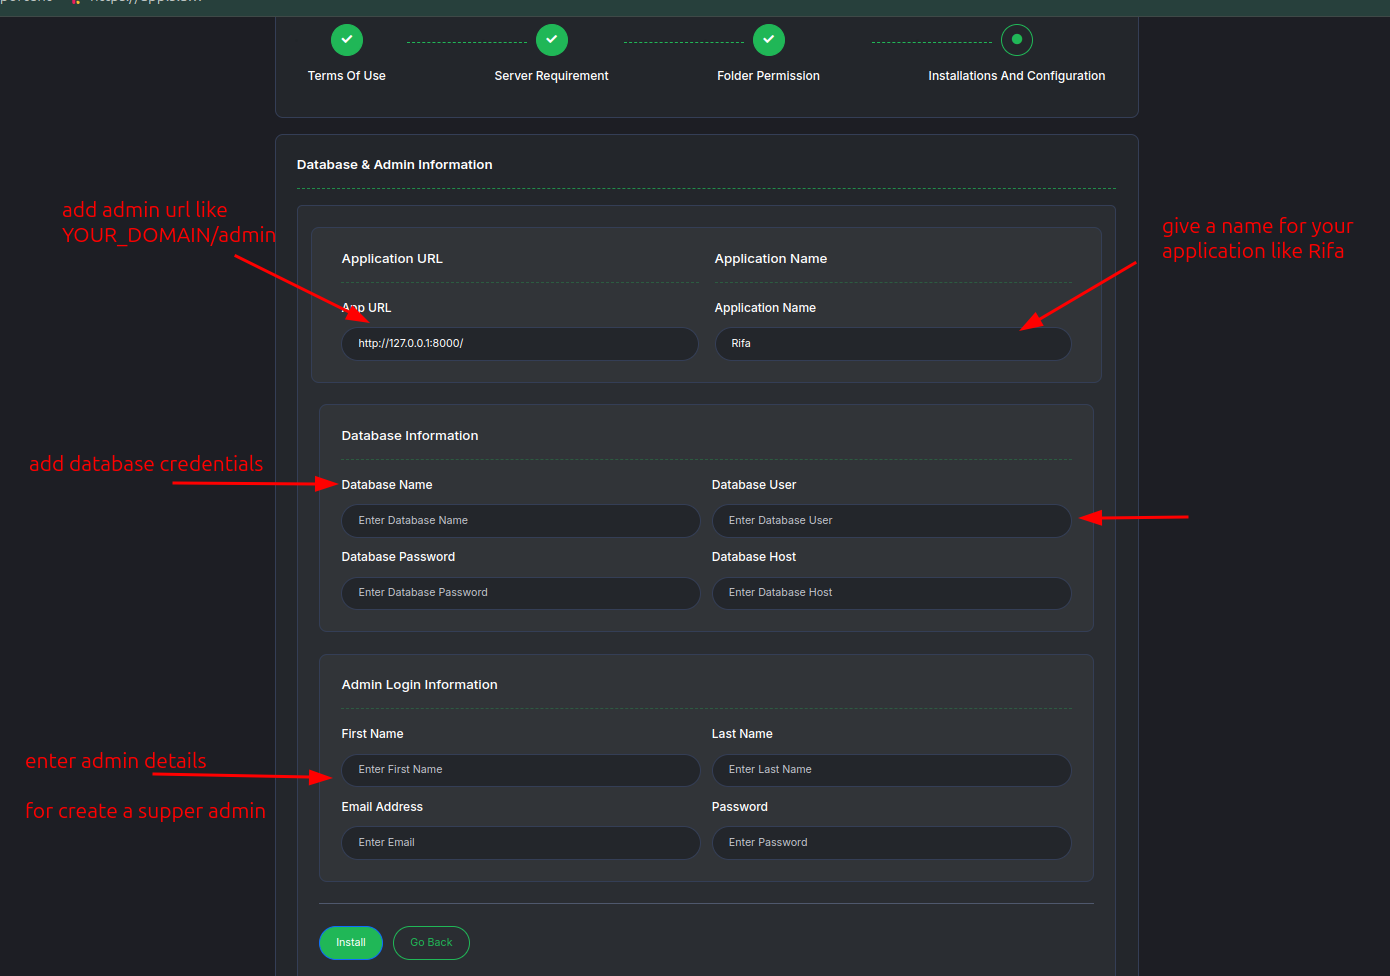
You see the configuration page and fill the required information.
- Application URL: http://yourdomain.com
- Application Name: Botivus
Database Information
- Database Name: Ex: botivus
- Database Username: ex: botivus
- Database Password: ex: botivus
- Database Host: localhost
Admin Information
- Admin First Name: ex: admin
- Admin Last Name: ex: admin
- Admin Email: ex: admin@gmail.com
- Admin Password: ex: 12345678
-
Now hit "Install" button.
- Now you will see the installation is completed. You can now access your Botivus on your domain name.
Cron Job
To run the cron job, you need to add a cron job with the following command:
/usr/local/bin/php /home/CPANEL_USERNAME/public_html artisan schedule:run >/dev/null 2>&1
This will run the artisan schedule:run command every minute.
Go to the cpanel then Advanced > Cron Job > Add New Cron Job
-
Select Common Settings like 'Once Per Minutes' or any other time interval.
-
Enter the command:
/usr/local/bin/php /home/CPANEL_USERNAME/public_html artisan schedule:run >/dev/null 2>&1 -
Save the cron job.
Note: Replace CPANEL_USERNAME with your cPanel username. or replace /home/CPANEL_USERNAME/public_html with your botivus folder path.
Follow the below images for setting up your cron job on cPanel.

Replace the CPANEL_USERNAME with your cPanel username.

Conclusion
Congratulations! You have successfully installed our Botivus on cPanel. See and setting up the all required configuration. If you have any questions, please contact our support team. 🚀