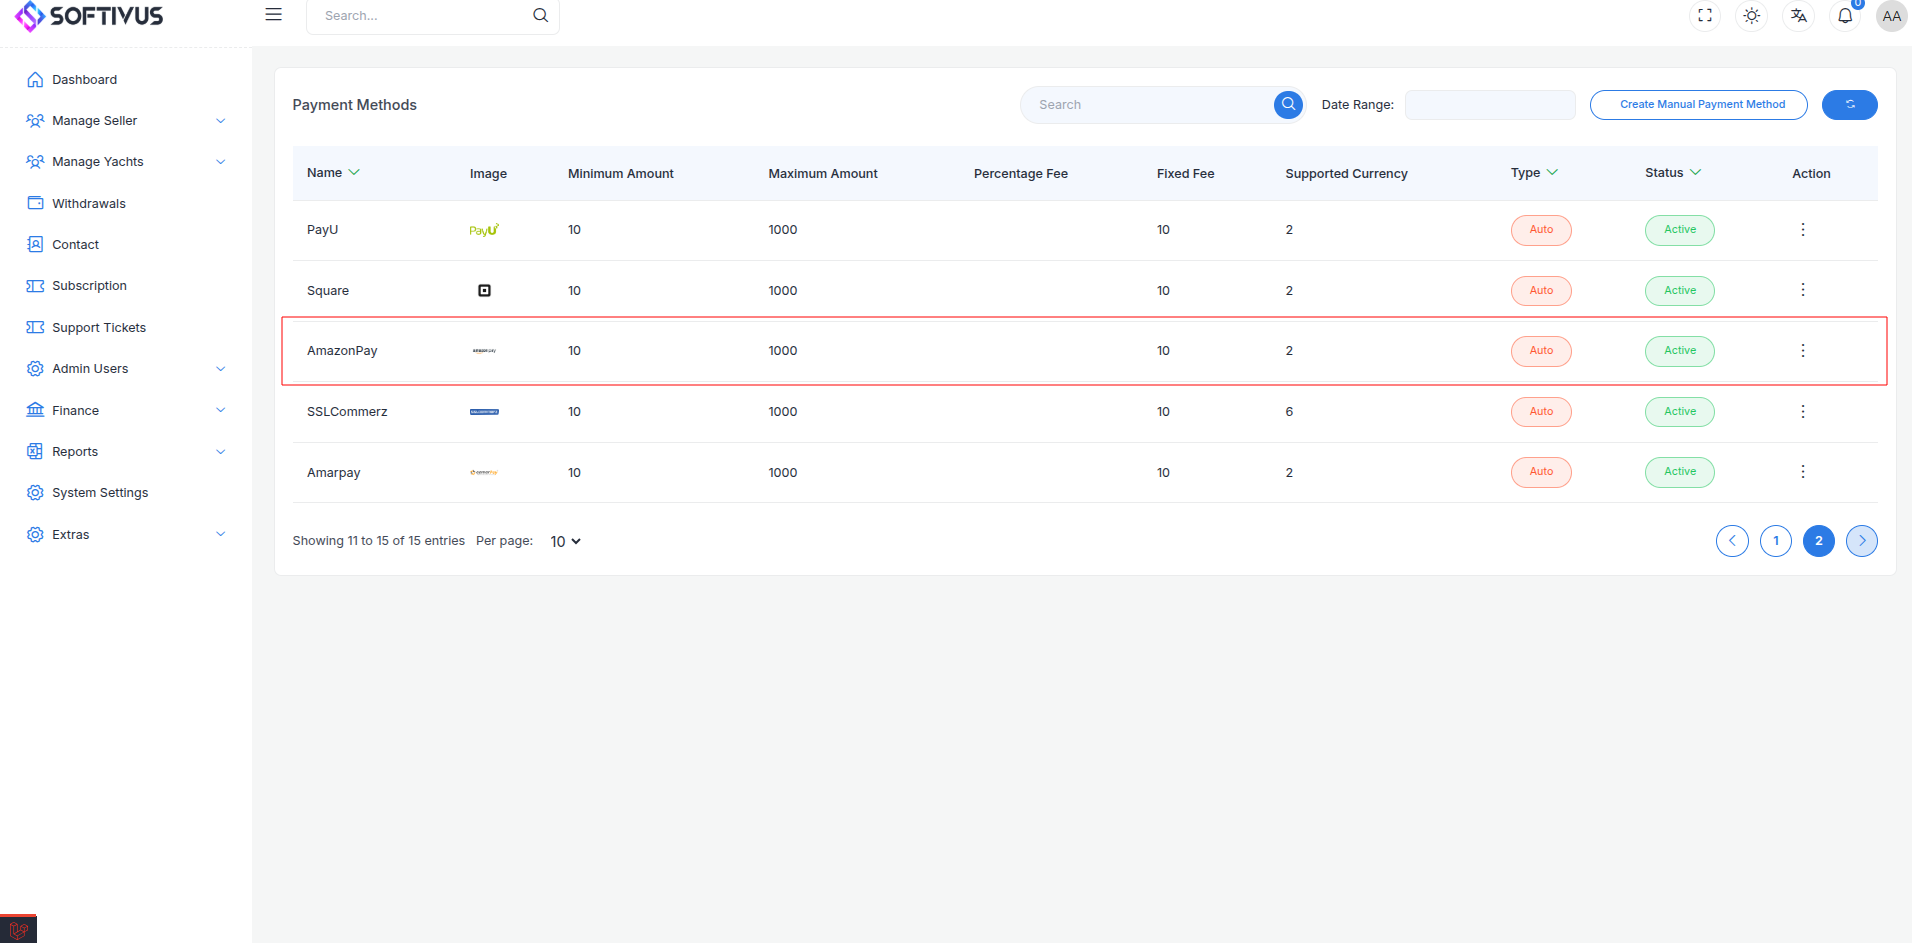
Amazon Pay Payment Gateway Integration
Amazon Pay is a payment service that allows merchants to accept payments using the payment methods and shipping information stored in customers’ Amazon accounts. Available in regions like the US, UK, EU, and Japan, it supports credit/debit cards, bank accounts, and Amazon Pay balance, with over 300 million active users globally. Amazon Pay offers features like one-click checkout, recurring payments, fraud protection via Amazon’s A-to-z Guarantee, and voice-enabled payments via Alexa, making it ideal for e-commerce businesses aiming to boost conversions with a trusted, fast checkout experience.
This guide walks you through integrating Amazon Pay into your application, from account creation to live deployment.
Step 1: Log in or Sign Up
- Visit Amazon Pay: Go to Amazon Pay and click Sign Up to create a merchant account or Log In if you have one.
- Account Creation: Provide your email, business name, country, and website URL. Choose a region (e.g., US, EU, UK, JP) based on your market.
- Email Verification: Check your inbox for a verification email from Amazon Pay and click the link to activate your account.
- Dashboard Access: Log in to Seller Central at sellercentral.amazon.com (region-specific) to manage your Amazon Pay settings. Sandbox access is automatic for testing.
Step 2: Set Up Your Account
Before processing payments, configure your Amazon Pay account:
-
Complete Your Profile:
- In Seller Central, go to Settings > Account Info.
- Enter your business details: legal name, address, phone number, and website URL (required for live transactions).
- For individuals, provide personal info (e.g., SSN in the US).
-
Business Verification (Required for Live Mode):
- Navigate to Settings > Integration Central > Verification.
- Submit documents like business registration, ID, and bank details (varies by region, e.g., EIN for US, VAT for EU).
- Verification takes 1-3 business days; you’ll be notified via email.
-
Add a Bank Account:
- Go to Settings > Account Info > Deposit Method.
- Add your bank details (e.g., IBAN for EU, routing/account number for US). Amazon Pay deposits funds typically within 3-5 business days.
- Verify with a test deposit if required.
-
Sandbox Mode: Use the Sandbox environment via developer.amazon.com/amazon-pay with test credentials to simulate transactions without verification.
Step 3: Obtain API Credentials
Amazon Pay uses asymmetric encryption with the following credentials:
- Public Key ID: Links to your public/private key pair (e.g.,
ABC123XYZ789). - Private Key: Generated locally, used to sign API requests.
- Merchant ID: Your unique seller identifier (e.g.,
A1B2C3D4E5F6G).
How to Get Your Credentials:
- Log in to Seller Central.
- Go to Settings > Integration Central.
- Generate Keys:
- Select Sandbox or Production from the Marketplace switcher.
- Click Generate Key Pair, name it (e.g., “MyStoreAPI”), and download the Private Key (.pem file).
- Copy the Public Key ID displayed after generation.
- Merchant ID: Find under Settings > Account Info > Your Merchant Token.
- Key Security: Store the Private Key securely (never share it) and use it server-side. Add all credentials to your application’s Admin Panel under System Settings > Payment Gateways > Amazon Pay.
Step 4: Configure Payment Methods
Amazon Pay uses payment methods linked to Amazon accounts, enabled by default:
- Go to Settings > Integration Central > Payment Options.
- Supported methods include:
- Cards: Visa, MasterCard, AmEx (via Amazon account).
- Bank Accounts: Linked via Amazon (region-specific).
- Amazon Pay Balance: Prepaid funds (where available).
- No additional activation is needed—methods depend on the buyer’s Amazon account. Contact support@amazonpay.com for region-specific queries.
- These methods appear in your checkout flow once integrated.
Step 5: Set Up Webhooks
Webhooks (Instant Payment Notifications, IPNs) notify your server of payment events:
- In Seller Central, go to Settings > Integration Central > IPN Settings.
- Click Edit under Instant Notification Settings.
- Webhook URL:
- Enter the URL from your application (e.g.,
https://yourwebsite.com/webhooks/amazonpay). - Find this URL in your Admin Panel under Amazon Pay settings.
- Ensure your endpoint uses TLS 1.2, accepts POST requests, and returns a 200 OK response.
- Enter the URL from your application (e.g.,
- Events: Amazon Pay sends events like:
Charge.Completed: Payment captured.Charge.Declined: Payment failed.Refund.Completed: Refund processed.
- Save the settings. Use your Private Key to verify signatures.
- Testing: Test IPNs in Sandbox mode using the Developer Portal.
Step 6: Set Up Credentials in Our Dashboard
Integrate Amazon Pay into your application:
- Log in to your application’s Admin Panel.
- Navigate to System Settings > Payment Gateways > Amazon Pay.

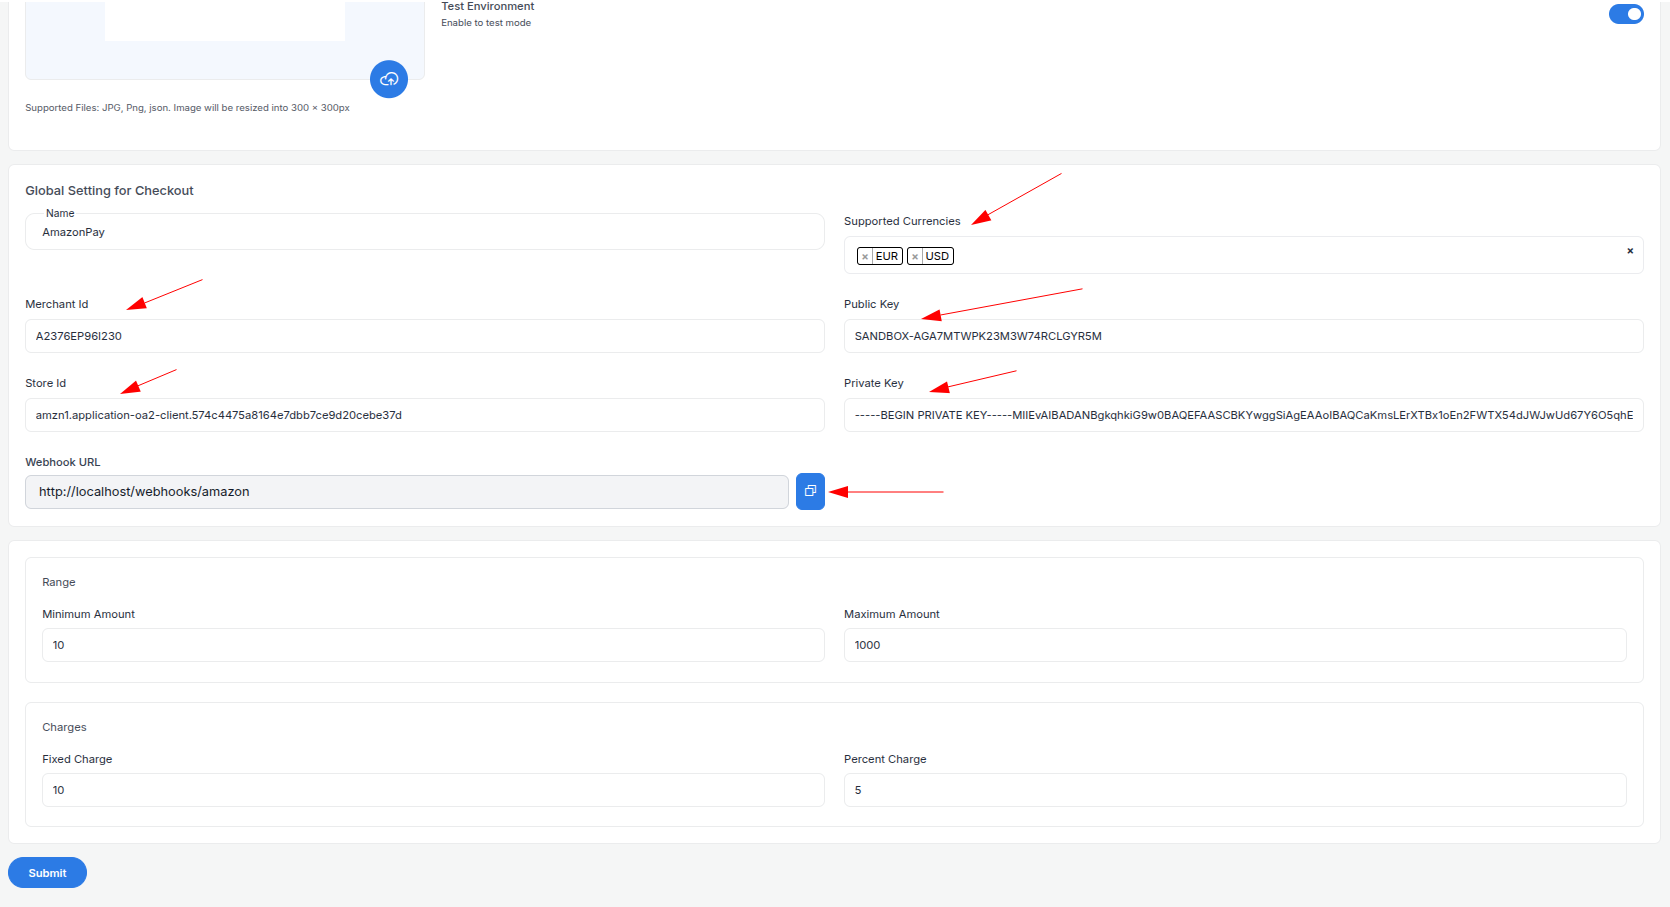
- Fill out the configuration form:

-
Detailed Fields:
- Supported Currencies: Select currencies enabled on your account (e.g., USD, EUR, GBP, JPY). Tied to your Merchant ID region.
- Active: Toggle “On” to enable Amazon Pay.
- Live Mode: Toggle “Off” for Sandbox, “On” for live transactions.
- Merchant ID: Enter your Merchant ID (e.g.,
A1B2C3D4E5F6G). - Public Key ID: Enter your Public Key ID (e.g.,
ABC123XYZ789). - Private Key: Upload or paste your Private Key (.pem content).
- Webhook URL: Copy this URL and paste it into Seller Central’s IPN settings.
- Minimum Amount: Set a floor (e.g., $1.00) per Amazon’s rules.
- Maximum Amount: Set a ceiling (e.g., $10,000) based on your needs.
- Fixed Charge: Add a flat fee (e.g., $0.50) per transaction, if applicable.
- Percentage Charge: Add a percentage fee (e.g., 1%) on top of Amazon Pay’s fees (2.9% + $0.30 in US).
-
Click Submit to save. Your Amazon Pay gateway is now configured.
Step 7: Test the Integration
Test your setup in Sandbox Mode:
- Enable Sandbox Mode:
- In Seller Central, switch to Sandbox View under Integration Central.
- In your Admin Panel, ensure Live Mode is off and use Sandbox credentials.
- Simulate Payments:
- Create a Sandbox buyer account via Seller Central > Settings > Sandbox Accounts.
- Use test cards from Amazon Pay Testing Guide:
- Success:
4111 1111 1111 1111, expiry12/25, CVV123. - Failure:
4000 0000 0000 0002, expiry12/25, CVV123.
- Success:
- Verify Webhooks:
- Check your server logs for IPN events (e.g.,
Charge.Completed). - Ensure payment statuses update in your Admin Panel (e.g., “Paid,” “Failed”).
- Check your server logs for IPN events (e.g.,
- Debugging: Use the Sandbox Dashboard’s Transactions tab or API logs for error details (e.g., “Card Declined”).
Step 8: Enable Live Mode
After successful testing:
- Amazon Pay Dashboard:
- Ensure your account is verified and switched to Production View in Seller Central.
- Log in to sellercentral.amazon.com.
- Admin Panel:
- Go to System Settings > Payment Gateways > Amazon Pay.
- Toggle Live Mode to “On”.
- Replace Sandbox credentials with live Merchant ID, Public Key ID, and Private Key.
- Save the changes.
- Webhook Confirmation: Verify the webhook URL is set in Production IPN settings.
Step 9: Go Live
Launch your Amazon Pay integration:
- Start Accepting Payments:
- Customers can now pay using their Amazon accounts at checkout.
- Monitor initial transactions for issues.
- Live Verification:
- In Seller Central, go to Performance > Amazon Pay Transactions to track payments.
- Confirm deposits to your bank account (3-5 business days).
- Troubleshooting:
- If payments fail, review logs in Seller Central or contact support@amazonpay.com.
- Ensure your webhook endpoint remains active.
Additional Tips
- Amazon Pay Fees: 2.9% + $0.30 per transaction (US); varies by region (e.g., 3.4% + £0.35 in UK). No setup or monthly fees. See pricing.
- Documentation: Explore the Amazon Pay Developer Docs for APIs like Checkout Session, Subscriptions, or Refunds.
- Support: Contact support@amazonpay.com or use Seller Central’s help section.
Note:
If you need further assistance, our support team is here 24/7. Reach out at softivus@gmail.com or through the Admin Panel. Let’s make your Amazon Pay integration fast, secure, and successful!