Cryptomus Payment Gateway Integration for Merchants
Cryptomus is a cryptocurrency payment gateway launched in 2022, based in Vancouver, Canada. It supports over 15 cryptocurrencies, including Bitcoin (BTC), Ethereum (ETH), USDT, and Litecoin, with transaction fees ranging from 0.4% to 2%. Key features include auto-conversion to stablecoins, White Label branding, fast processing (1-2 minutes), and plugins for platforms like WooCommerce, Magento, and WHMCS. Cryptomus is ideal for e-commerce, digital services, and global businesses looking to accept secure, low-cost crypto payments.
This guide outlines the process for merchants to set up Cryptomus, configure their dashboard, and integrate it into their application for seamless client payments. It includes details on testing webhooks for integration validation and an Alerts section for critical information.
Step 1: Sign Up or Log In
- Visit Cryptomus: Go to cryptomus.com and click Sign Up to create a merchant account or Log In if you have an existing account.
- Account Creation: Register using an email, phone number, or third-party wallet (e.g., TonKeeper, MetaMask, Trust Wallet). Create a strong password and accept the terms.
- Verification: Confirm your account via a code sent to your email or phone. Wallet-based signups skip this step for anonymity.
- Dashboard Access: Log in to the Cryptomus Merchant Dashboard at app.cryptomus.com. API credentials are available post-registration for testing and integration.
Step 2: Set Up Your Merchant Account
Configure your Cryptomus account in the Merchant Dashboard before accepting payments:
-
Create a Merchant Profile:
- In the Dashboard, go to Overview > Business Wallet.
- Click Create Merchant, enter a merchant name (e.g., your business name), and submit.
- This creates a Business Wallet for receiving payments, separate from your Personal Wallet for storing or transferring crypto.
-
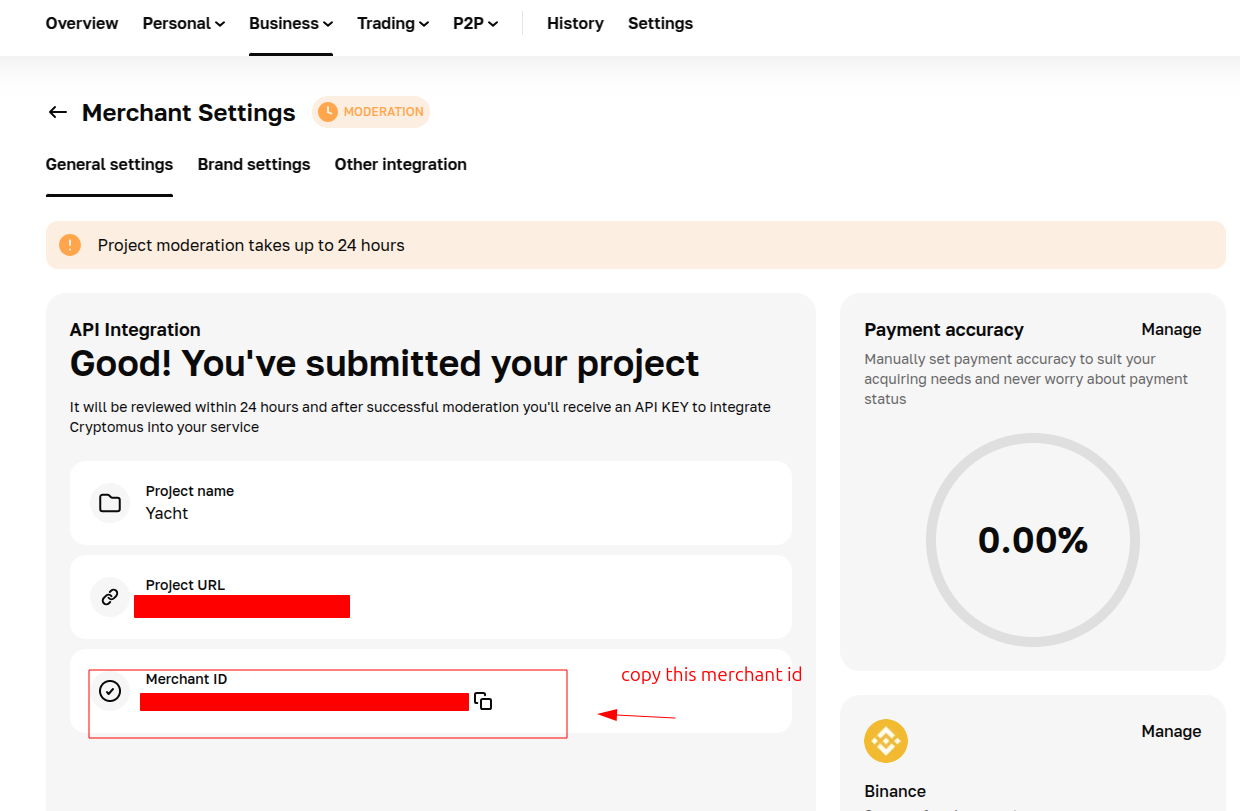
Merchant Verification (Required for Live Mode):
- Navigate to Settings > API Integration.
- Submit your website URL and a brief project description for moderation. For platforms like SendPulse, verify ownership by adding a meta tag or file to your site’s
<head>section. - Moderation takes 1-2 business days, with email confirmation upon approval.
-
Configure Business Wallet:
- Go to Settings > Business Wallet.
- Enable auto-conversion (e.g., BTC to USDT) to mitigate volatility risks, free of charge.
- Optionally, link third-party exchanges for fiat withdrawals; no bank account is required.
-
Testing Preparation: Cryptomus does not offer a full Sandbox environment but provides a testing webhook endpoint for validating webhook integration. Access this after obtaining API credentials.
Step 3: Obtain API Credentials
Cryptomus provides credentials for API integration:
- Merchant UUID: A unique identifier for your merchant account (e.g.,
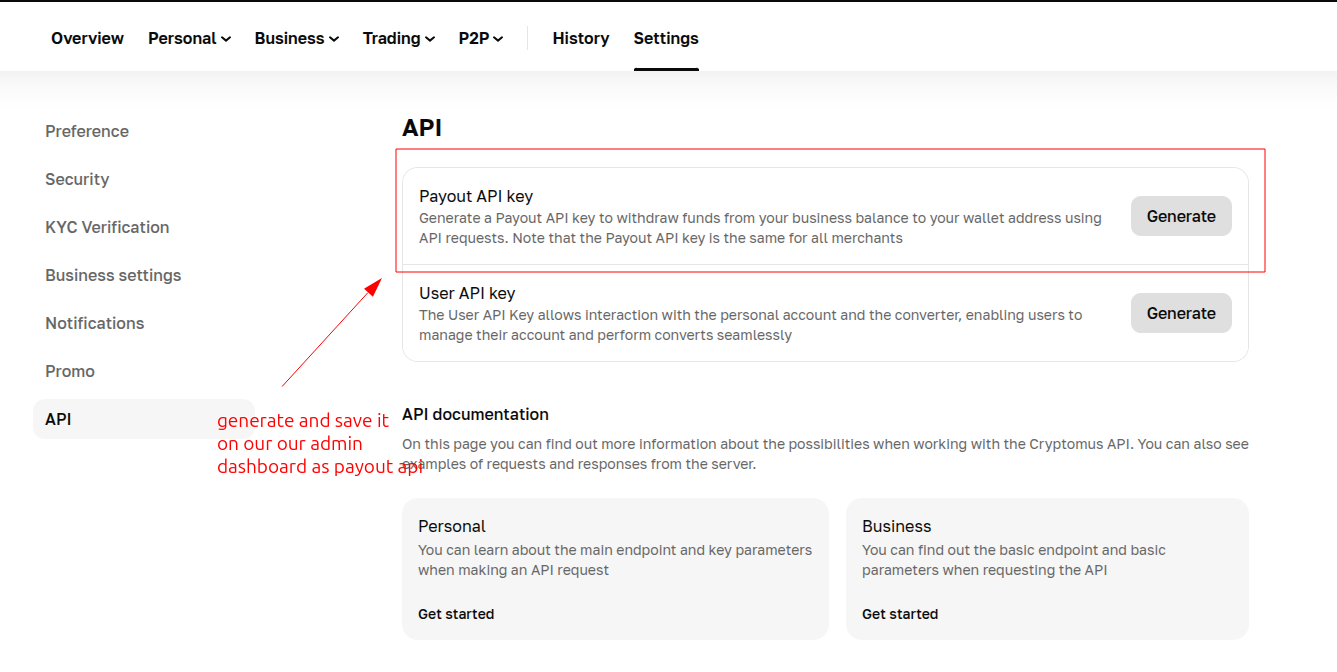
123e4567-e89b-12d3-a456-426614174000). - Payment API Key: A secret key for signing payment requests.
How to Get Your Credentials:
- Log in to the Merchant Dashboard at app.cryptomus.com.
- Go to Settings > API Integration.
- Copy the following:
- Merchant UUID: Found under the API section.
- Payment API Key: Displayed or generated here.
- Testing Credentials: Use your live Merchant UUID and Payment API Key for testing webhooks, as no separate test credentials are provided. The testing webhook endpoint simulates events without real transactions.
- Key Security: Store API keys securely and use them server-side only. Add them to your application’s Admin Panel under System Settings > Payment Gateways > Cryptomus.
Step 4: Configure Payment Methods
Cryptomus supports over 15 cryptocurrencies, configurable in the Dashboard:
- Go to Settings > Payment Methods.
- Enable desired cryptocurrencies, including:
- Major Coins: Bitcoin (BTC), Ethereum (ETH), Litecoin (LTC).
- Stablecoins: USDT, USDC.
- Others: TRON (TRX), Dogecoin (DOGE), Dash.
- Select specific networks (e.g., USDT on TRON, BSC, or ERC20) to optimize fees.
- Contact support@cryptomus.com or Telegram (@cryptomussupport) for custom coin requests.
- Enabled cryptocurrencies will appear in your checkout flow after integration.
Step 5: Set Up Credentials in Your Dashboard
Integrate Cryptomus into your application’s Admin Panel:
- Log in to your application’s Admin Panel.
- Navigate to System Settings > Payment Gateways > Cryptomus.
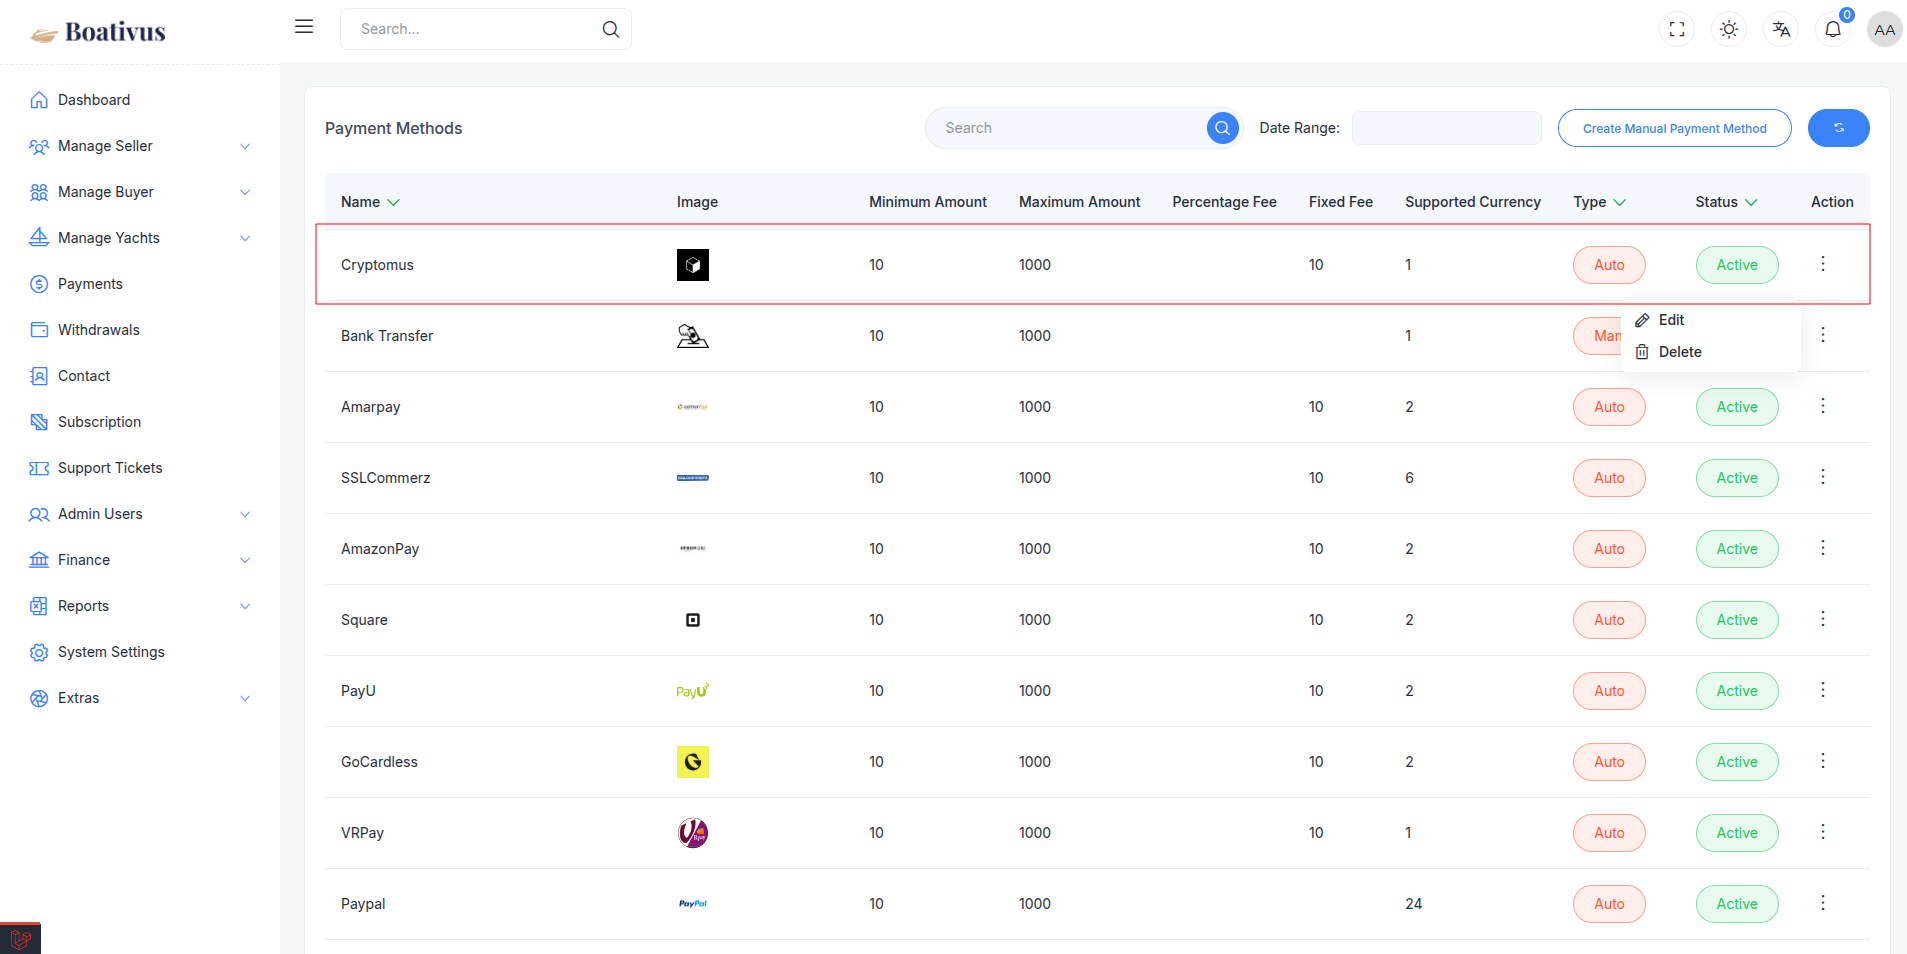
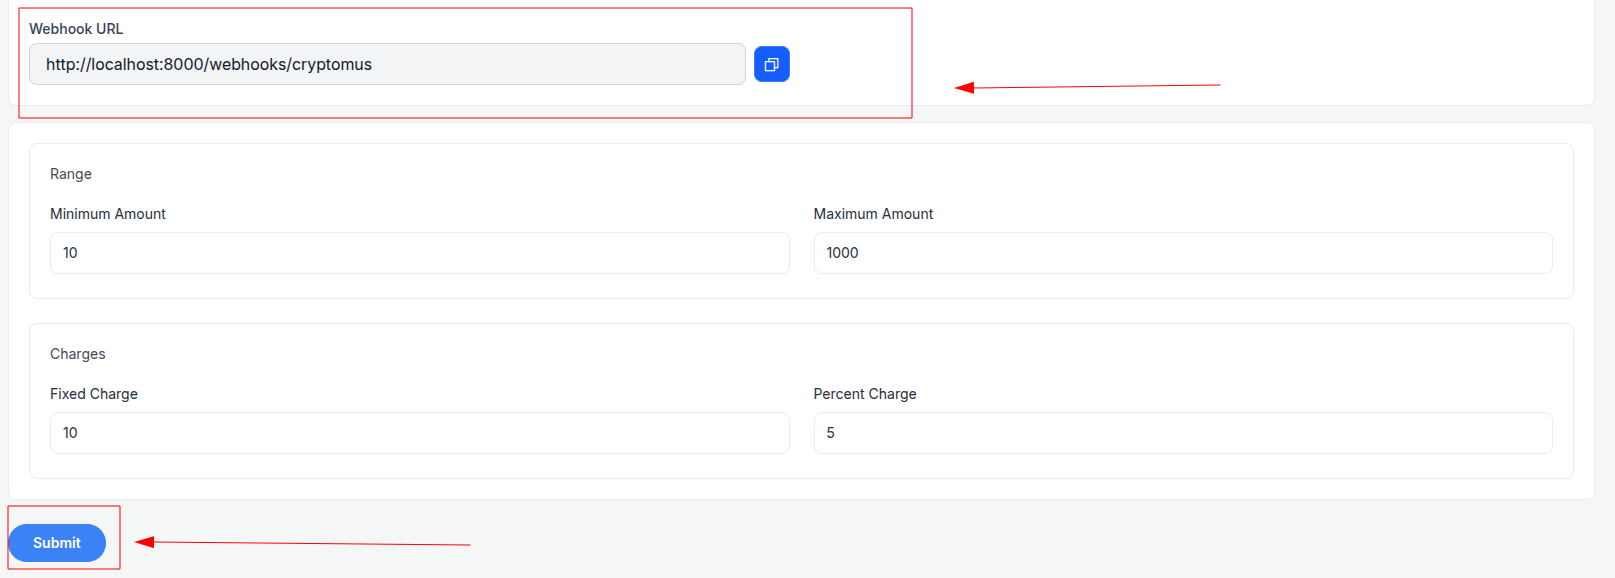
- Fill out the configuration form:
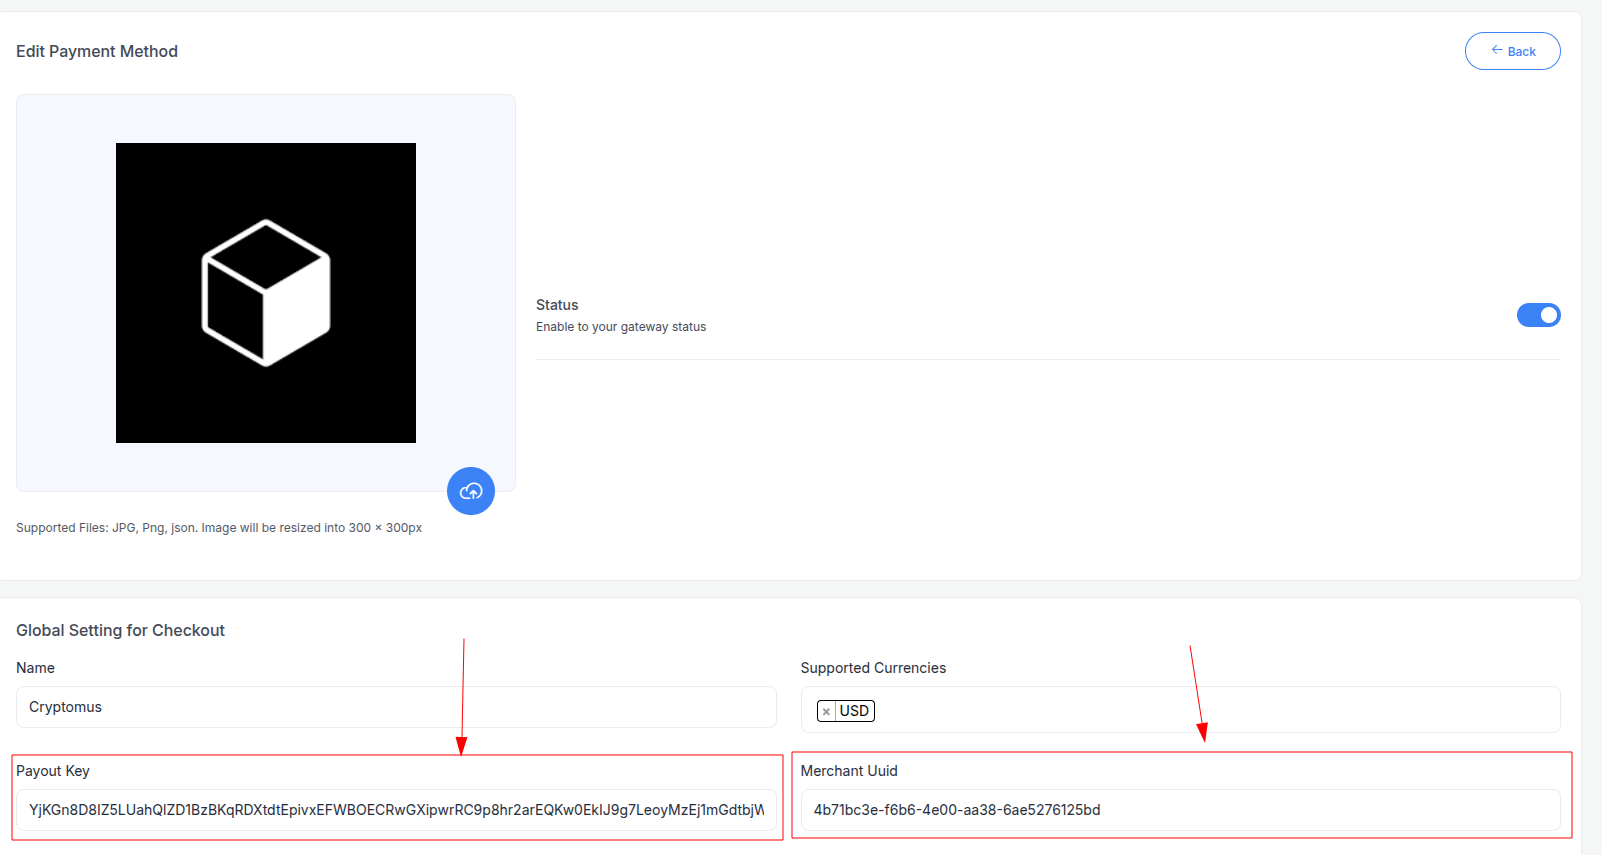
 4. Detailed Fields:
- Supported Currencies: Select enabled cryptocurrencies (e.g., BTC, ETH, USDT).
- Active: Toggle “On” to enable Cryptomus payments.
- Live Mode: Toggle “On” for live transactions; keep “Off” during webhook testing.
- Merchant UUID: Enter your Merchant UUID (e.g.,
123e4567-e89b-12d3-a456-426614174000). - Payment API Key: Enter your Payment API Key (secure alphanumeric string).
- Webhook URL: This is the URL where Cryptomus sends payment events for processing in your application.
- Minimum Amount: Set a floor (e.g., $1 or equivalent) per Cryptomus rules.
- Maximum Amount: Set a ceiling (e.g., $100,000) based on your needs.
- Fixed Charge: Add a flat fee (e.g., $0.50) per transaction, if applicable.
- Percentage Charge: Add a percentage fee (e.g., 1%) on top of Cryptomus’s 0.4%-2% fee.
- Click Submit to save. Your Cryptomus gateway is now configured.
Step 7: Test the payment gateway
Cryptomus does not offer a full Sandbox environment or any testing options. Carefully setup all thinks and configure your Cryptomus gateway before accepting real payments.
Note:
For further assistance, our support team is available 24/7. Contact us at support@cryptomus.com or through your application’s Admin Panel. Simplify your crypto payments with Cryptomus!