ToyyibPay Payment Gateway Integration
ToyyibPay is a Malaysia-based online payment gateway designed to simplify digital transactions for businesses and organizations, particularly in Southeast Asia. It supports payments via FPX (Financial Process Exchange) online banking, credit/debit cards, and other local methods, with a focus on affordability (as low as RM1 per transaction) and ease of use. ToyyibPay offers features like automated transaction verification, split payments, and integrations with popular platforms via APIs and plugins, making it an excellent choice for SMEs, startups, and enterprises in Malaysia looking to streamline payments in Ringgit Malaysia (MYR).
This guide walks you through integrating ToyyibPay into your application, from account creation to live deployment.
Step 1: Log in or Sign Up
- Visit ToyyibPay: Go to ToyyibPay and click Daftar Sekarang (Register Now) to create a new account or Log In if you already have one.
- Account Creation: Provide your email, username, password, and basic business details (e.g., business name, phone number). ToyyibPay supports both personal and business accounts.
- Email Verification: Check your inbox (or spam folder) for a verification email from ToyyibPay and click the link to activate your account.
- Dashboard Access: After verification, log in to the ToyyibPay Dashboard at toyyibpay.com to manage payments, API keys, and settings.
Step 2: Set Up Your Account
Before processing payments, configure your ToyyibPay account:
-
Complete Your Profile:
- In the ToyyibPay Dashboard, go to Settings > Profile.
- Enter your business details: legal name, address, phone number, and website URL (optional for testing).
- For personal accounts, provide your full name and contact information.
-
Business Verification (Required for Live Mode):
- Navigate to Settings > Verification.
- Submit documents such as a business registration certificate (e.g., SSM ROC/ROB for Malaysia), ID, and bank details. Requirements vary by account type.
- Verification takes 1-3 business days. You’ll be notified via email once approved.
-
Add a Settlement Bank:
- Go to Settings > Bank Accounts.
- Add your bank account details (e.g., bank name, account number) for payouts. ToyyibPay supports all major Malaysian banks via FPX.
- A test deposit of RM0.01 may be sent to verify the account.
-
Test Mode: Use the Sandbox environment at dev.toyyibpay.com for testing without verification. Live mode requires approval.
Step 3: Obtain API Credentials
ToyyibPay uses the following credentials for integration:
- Secret Key: A unique key for secure API authentication.
- Category Code: Identifies the type of transactions (e.g., product sales, subscriptions).
- Test vs. Live: Use Sandbox credentials for testing (via dev.toyyibpay.com) and live credentials for production.
How to Get Your Credentials:
- Log in to the ToyyibPay Dashboard.
- Secret Key:
- Go to Settings (scroll to the bottom of the Dashboard).
- Locate Your Secret Key (e.g.,
w5x7srq7-rx5r-3t89-2ou2-k7361x2jewhn) and copy it.
- Category Code:
- Go to Category > Add New Category.
- Create a category (e.g., "Online Store Payments") with a name and description.
- After saving, copy the generated Category Code (e.g.,
gcbhict9).
- Key Security: Keep the Secret Key confidential—use it only in server-side code. Store all credentials securely.
- Add these to your application’s Admin Panel under System Settings > Payment Gateways > ToyyibPay.
Step 4: Configure Payment Methods
ToyyibPay supports various payment methods, activated based on your plan:
- Go to Settings > Payment Channels in the Dashboard (or contact support for options).
- Available methods include:
- FPX Online Banking: Covers all major Malaysian banks (enabled by default).
- Credit/Debit Cards: Visa, MasterCard (requires the Card Payments Add-on, 1.5% for local, 2.35% for foreign cards).
- Enable card payments by subscribing to the add-on via Settings > Plans. Contact support@toyyibpay.com if additional methods are needed.
- These methods will appear in your checkout flow once integrated.
Step 5: Set Up Webhooks
Webhooks (Callback URLs) notify your server of payment events:
- In the ToyyibPay Dashboard, go to Settings > API Keys & Webhooks.
- Locate the Callback URL field (ToyyibPay uses this term for webhooks).
- Webhook URL:
- Enter the URL from your application (e.g.,
https://yourwebsite.com/webhooks/toyyibpay). - Find this URL in your Admin Panel under ToyyibPay settings.
- Ensure your endpoint accepts POST requests and returns a 200 OK response. Localhost URLs are not supported.
- Enter the URL from your application (e.g.,
- ToyyibPay sends events like
billpaymentStatus(e.g., "1" for success) with details likebillpaymentInvoiceNoandbillExternalReferenceNo. - Save the settings.
- Testing: Use the Sandbox at dev.toyyibpay.com to simulate webhook notifications.
Step 6: Set Up Credentials in Our Dashboard
Integrate ToyyibPay into your application:
- Log in to your application’s Admin Panel.
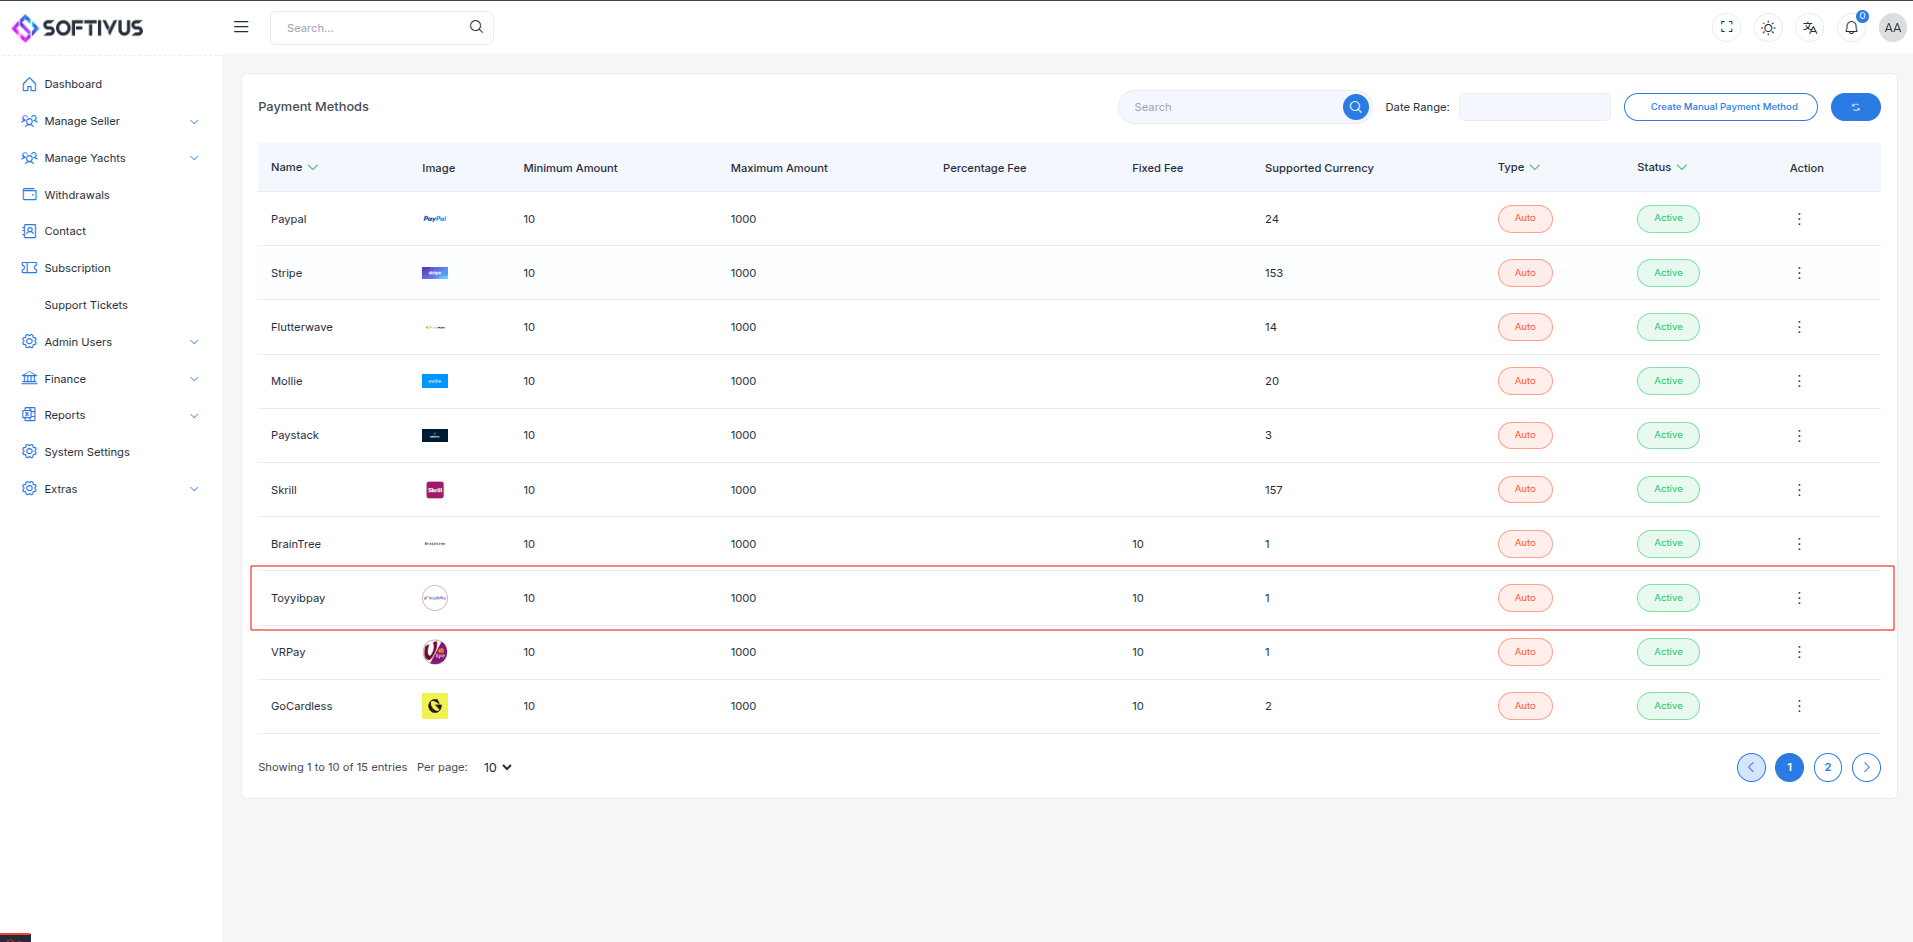
- Navigate to System Settings > Payment Gateways > ToyyibPay.

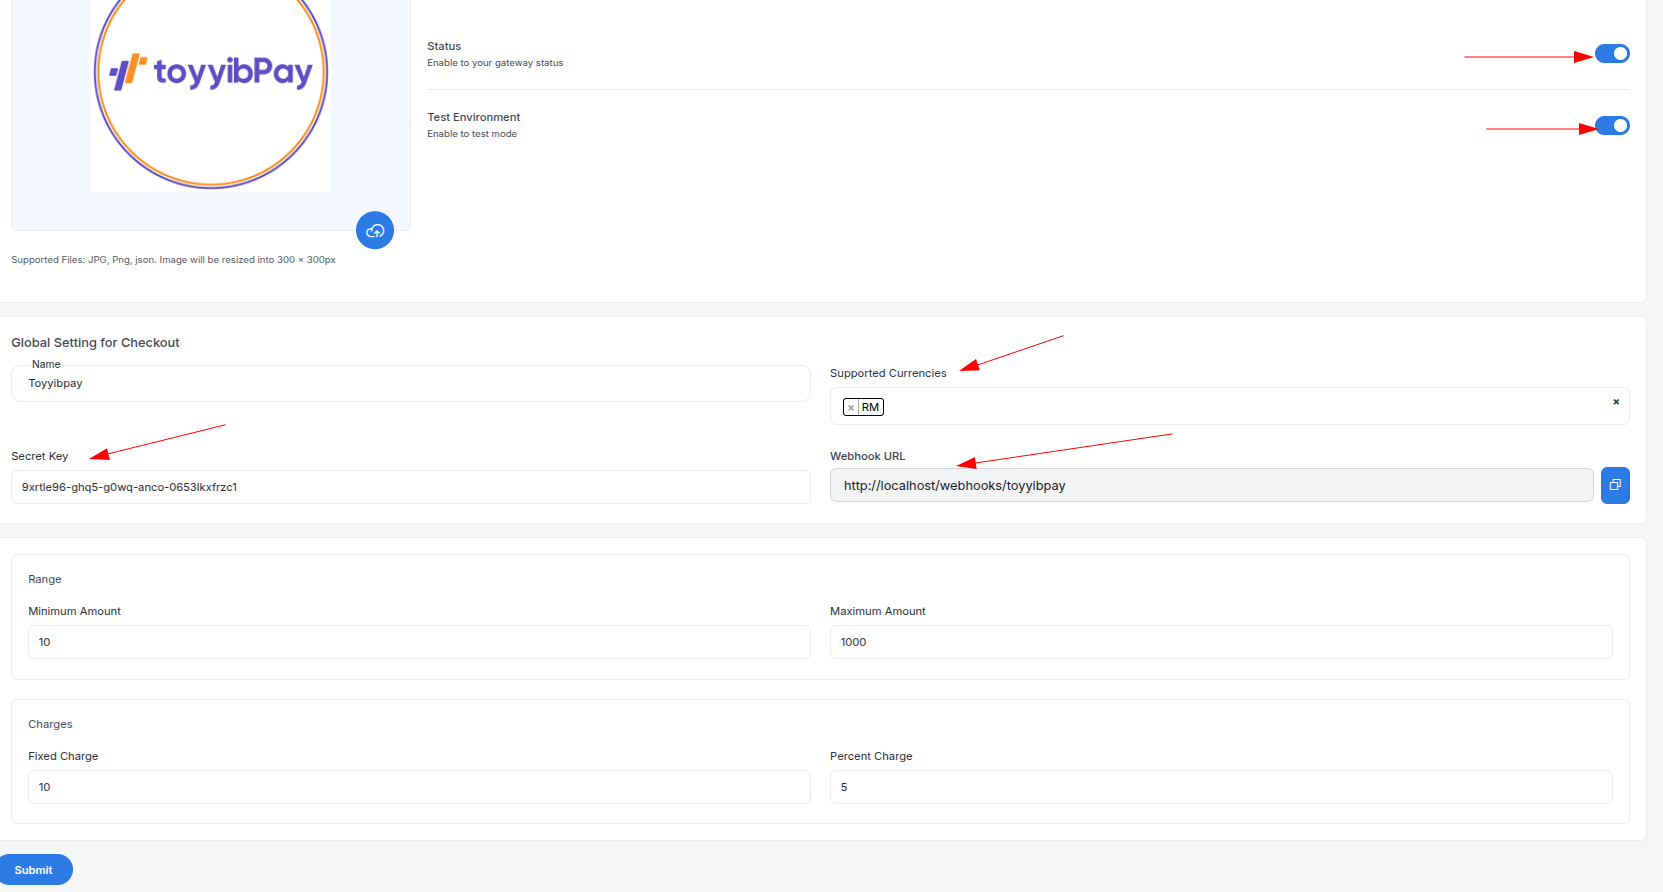
- Fill out the configuration form:

-
Detailed Fields:
- Supported Currencies: ToyyibPay supports MYR only. Select "MYR" as the currency.
- Active: Toggle “On” to enable ToyyibPay payments.
- Live Mode: Toggle “Off” for Sandbox, “On” for live transactions.
- Secret Key: Enter your ToyyibPay Secret Key (e.g.,
w5x7srq7-rx5r-3t89-2ou2-k7361x2jewhn). - Category Code: Enter your Category Code (e.g.,
gcbhict9). - Webhook URL: Copy this URL and paste it into the ToyyibPay Dashboard’s Callback URL field.
- Minimum Amount: Set a floor (e.g., RM1.00) to avoid small transactions.
- Maximum Amount: Set a ceiling (e.g., RM10,000) based on your needs.
- Fixed Charge: Add a flat fee (e.g., RM0.50) per transaction, if applicable.
- Percentage Charge: Add a percentage fee (e.g., 1%) on top of ToyyibPay’s fees (RM1 for FPX, 1.5%-2.35% for cards).
-
Click Submit to save. Your ToyyibPay gateway is now configured.
Step 7: Test the Integration
Test your setup in Sandbox Mode:
- Enable Sandbox Mode:
- Register a Sandbox account at dev.toyyibpay.com.
- In your Admin Panel, ensure Live Mode is off and use Sandbox Secret Key and Category Code.
- Simulate Payments:
- Use ToyyibPay’s Bank Simulator in the Sandbox:
- FPX: Select a test bank and complete the payment flow.
- Cards: Use test numbers like
4111 1111 1111 1111, expiry12/25, CVV123(requires card add-on).
- Test various scenarios (success, failure).
- Use ToyyibPay’s Bank Simulator in the Sandbox:
- Verify Webhooks:
- Check your server logs for webhook events (e.g.,
billpaymentStatus=1). - Ensure payment statuses update in your Admin Panel (e.g., “Paid,” “Pending”).
- Check your server logs for webhook events (e.g.,
- Debugging: If issues arise, check the Sandbox Dashboard’s Transactions tab for error details.
Step 8: Enable Live Mode
After successful testing:
- ToyyibPay Dashboard:
- Ensure your account is verified and ready for live transactions.
- Log in to toyyibpay.com.
- Admin Panel:
- Go to System Settings > Payment Gateways > ToyyibPay.
- Toggle Live Mode to “On”.
- Replace Sandbox credentials with live Secret Key and Category Code.
- Save the changes.
- Webhook Confirmation: Verify the Callback URL is set correctly in the live Dashboard.
Step 9: Go Live
Launch your ToyyibPay integration:
- Start Accepting Payments:
- Customers can now pay via FPX or cards at checkout.
- Monitor initial transactions for issues.
- Live Verification:
- In the ToyyibPay Dashboard, go to Transactions to track payments in real-time.
- Confirm settlements to your bank account (1-4 business days, depending on settings).
- Troubleshooting:
- If payments fail, review error logs in the Dashboard or contact support@toyyibpay.com.
- Ensure your webhook endpoint remains active.
Additional Tips
- ToyyibPay Fees: RM1 per FPX transaction (Standard Plan), 1.5% for local cards, 2.35% for foreign cards (Card Add-on). No setup or annual fees. Review plans at toyyibpay.com/pricing.
- Documentation: Explore the ToyyibPay API Reference for advanced features like split payments or bill creation.
- Support: Contact ToyyibPay via support@toyyibpay.com, WhatsApp, or Facebook Messenger (linked on their site).
Note:
If you need further assistance, our support team is here to help. Reach out at softivus@gmail.com or through the Admin Panel. Let’s make your ToyyibPay integration smooth and successful!