Paypal Payment Gateway Integration
Paypal is a popular payment gateway that allows you to accept payments online through a secure and easy-to-use platform. You can use Paypal as a payment gateway in Botivus to accept payments from your users.
Step 1: Log in or Sign Up
- Go to Paypal Developer and sign up or log in to your Paypal developer account.
- Once you're logged in, you'll be redirected to the Paypal dashboard.
Step 2: Create App
- On the PayPal Developer Dashboard, go to My Apps & Credentials.
- Under the REST API apps section, click Create App.
- Name your app (e.g., "My Production App") and select the relevant account (Personal or Business).
- Click and Create App.
Step 3: API Credentials
After creating your app, PayPal will provide the following:
- Client ID: Public key used in the frontend.
- Secret Key: Private key used in the backend.
- Staging & Live Modes: You will start in Staging Mode for testing, then you can switch to Live Mode for real transactions.
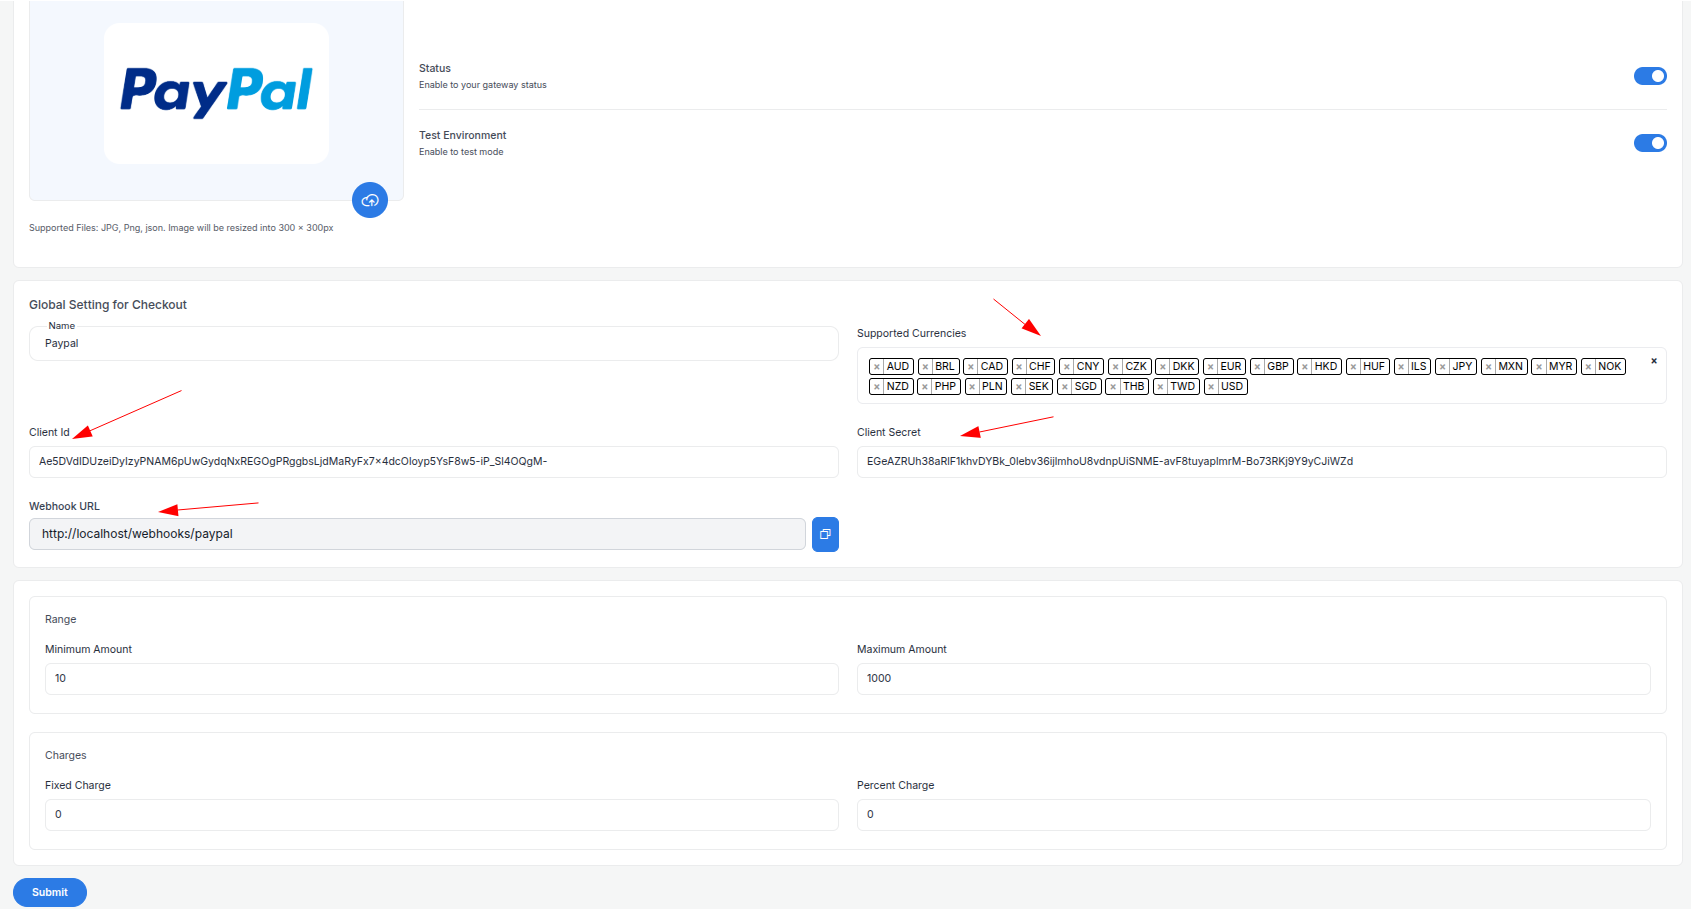
All the credentials copy and paste on your application Admin Panel System Settings > Payment Gateways > PayPal
To get your credentials:
- Navigate to the Live toggle to switch to production.
- Copy the Client ID and Secret Key from the dashboard.
Step 4: Set Up Webhooks
- In the My Apps & Credentials section, under your app, click Manage Webhooks. Click Add Webhook.
- Enter your Webhook URL. This is the URL on your server where PayPal will send event notifications (e.g.,
https://yourwebsite.com/webhooks/paypalyou can get this on your admin panel of your website). - Under Event Types, select the events you want to receive notifications for (e.g.,
PAYMENT.SALE.COMPLETED, PAYMENT.SALE.DENIED). - Click Save to confirm the webhook.
Once saved, PayPal will provide you with a Webhook ID and a Webhook Signing Certificate (used to verify that the event data is genuinely coming from PayPal).
Step 5: Setup All credentials in our Dashboard
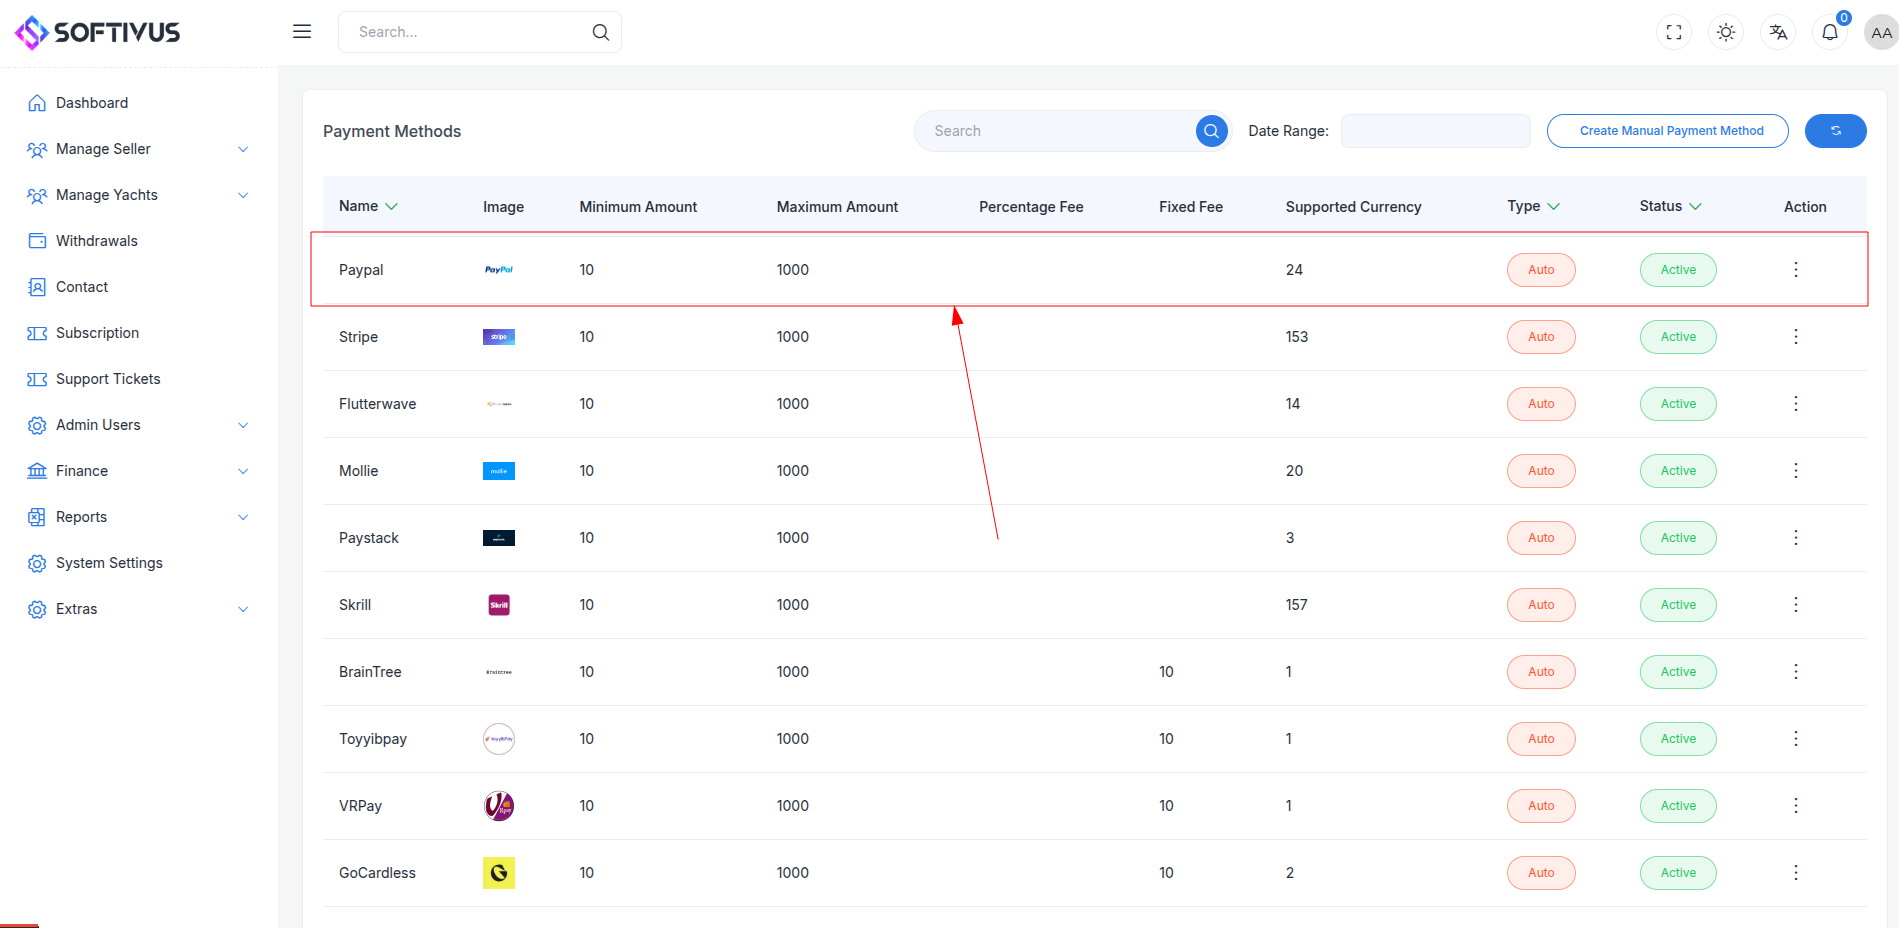
- Go Our admin dashboard and navigate to the "Payment Gateways" section System Settings > Payment Gateways > paypal.

- Enter your paypal API keys in the form provided. Follow the instructions to set up the payment gateway.

- Setting up yur required all you have to need:
- Supported Currencies: Select the currencies you want to accept payments in.
- Active: Turn on the payment gateway to accept payments.
- Live Mode: Enable live mode to process real transactions.
- Client id: Enter your paypal client id.
- Client secret: Enter your Stripe client secret.
- Webhook URL: Copy the webhook URL from here then paste it in the webhook URL field to the stripe dashboard.
- Minimum Amount: Set the minimum amount for the payment.
- Maximum Amount: Set the maximum amount for the payment.
- Fixed Charge: Set the fixed charge for the payment.
- Percentage Charge: Set the percentage charge for the payment.
then click on "Submit" button and your payment gateway is ready to accept payments.
Step 6: Test the Integration
- While in Live Mode, you can test the integration with PayPal using the sandbox credentials.
- Test various payment flows (e.g., successful payments, failed payments).
- Use the PayPal Sandbox account to make test purchases.
Step 7: Enable Live Mode
- After successful testing, switch to Live Mode in PayPal's My Apps & Credentials section.
- Update your application with your Live Client ID and Live Secret Key.
Step 8: Go Live
- After enabling live mode, you can start accepting payments from your users.
- Verify that you’re using the correct Live API credentials in your app.
- Make real transactions to ensure the system works smoothly in production.
Note:
If you have any questions or need further assistance, please don't hesitate to contact our support team. We are here to help you every step of the way.