Skrill Payment Gateway Integration
Skrill is a global payment gateway that simplifies digital payments for businesses and individuals. Since 2001, it has offered a secure platform for processing payments in over 40 currencies and nearly 200 countries. Skrill supports a wide range of payment methods, including credit/debit cards, bank transfers, and local payment options, making it ideal for businesses aiming to expand internationally. With features like Quick Checkout and robust fraud protection, Skrill ensures fast, secure, and seamless transactions.
This guide walks you through integrating Skrill into your application, from account setup to live deployment.
Step 1: Log in or Sign Up
- Visit Skrill: Go to Skrill and click Sign Up to create a new business account or Log In if you already have one.
- Account Creation: Select Business Account during signup. Provide your email, password, and business details (e.g., company name, country).
- Email Verification: Check your inbox for a verification email from Skrill and click the link to activate your account.
- Dashboard Access: After verification, log in to access the Skrill Merchant Dashboard, where you’ll manage payments, API keys, and settings.
Step 2: Set Up Your Account
Before processing payments, configure your Skrill account:
-
Complete Your Profile:
- In the Skrill Dashboard, go to My Account > Settings > Business Details.
- Enter your business information: legal name, address, phone number, and website URL (required for live transactions).
- For individuals operating as merchants, provide personal details instead.
-
Business Verification (Required for Live Mode):
- Skrill requires verification for real payments. Navigate to My Account > Settings > Verification.
- Submit documents like a business registration certificate, ID, and proof of address (requirements vary by country).
- Verification typically takes 1-3 business days. You’ll be notified via email once approved.
-
Add a Payout Method:
- Go to My Account > Settings > Withdrawal Options.
- Link a bank account for payouts by entering your IBAN or local bank details.
- Skrill may require a test deposit to verify the account.
-
Test Mode: You can use Test Mode immediately after signup without verification, using test credentials.
Step 3: Obtain API Credentials
Skrill provides credentials for integration:
- Merchant Email: Your registered Skrill email, used as the primary identifier.
- API/MQI Password: For secure API access.
- Secret Word: A custom string for verifying transaction callbacks.
- Test vs. Live: Test credentials work instantly; live credentials require verification.
How to Get Your Credentials:
- In the Skrill Dashboard, go to My Account > Settings > Developer Settings.
- Configure the following:
- API/MQI Access: Enable Automatic Payment Interface (API) and Merchant Query Interface (MQI) by checking the respective boxes.
- API/MQI Password: Set a strong password for API access.
- Secret Word: Create a unique secret word (case-sensitive) for transaction verification.
- Note your Merchant Email (the email you signed up with).
- Key Security: Keep the API/MQI Password and Secret Word confidential—use them only in server-side code. Copy all credentials and store them securely.
- Add these to your application’s Admin Panel under System Settings > Payment Gateways > Skrill.
Step 4: Configure Payment Methods
Skrill supports various payment methods, enabled based on your account settings:
- Go to My Account > Settings > Payment Options in the Skrill Dashboard.
- Available methods include:
- Cards: Visa, MasterCard, etc. (enabled by default).
- Bank Transfers: Local and international options (enabled post-verification).
- Alternative Payments: Local methods like Sofort or Rapid Transfer (request activation via support).
- Contact Skrill support at support@skrill.com to enable additional methods or currencies not visible by default.
- These methods will appear in your checkout flow once integrated.
Step 5: Set Up Webhooks
Webhooks (status URLs) notify your server of payment events:
- In the Skrill Dashboard, go to My Account > Settings > Developer Settings.
- Look for the Status URL or Webhook section (Skrill uses “status URL” terminology).
- Webhook URL:
- Enter the URL from your application (e.g.,
https://yourwebsite.com/webhooks/skrill). - Find this URL in your Admin Panel under Skrill settings.
- Ensure your endpoint accepts POST requests and returns a 200 OK response.
- Enter the URL from your application (e.g.,
- Skrill sends events like payment completion or failure to this URL, signed with your Secret Word for verification.
- Save the settings.
- Port Configuration: Skrill sends notifications to port 443 by default (HTTPS). Ensure your server supports this, or configure alternative ports (e.g., 80, 88) if needed.
Step 6: Set Up Credentials in Our Dashboard
Integrate Skrill into your application:
- Log in to your application’s Admin Panel.
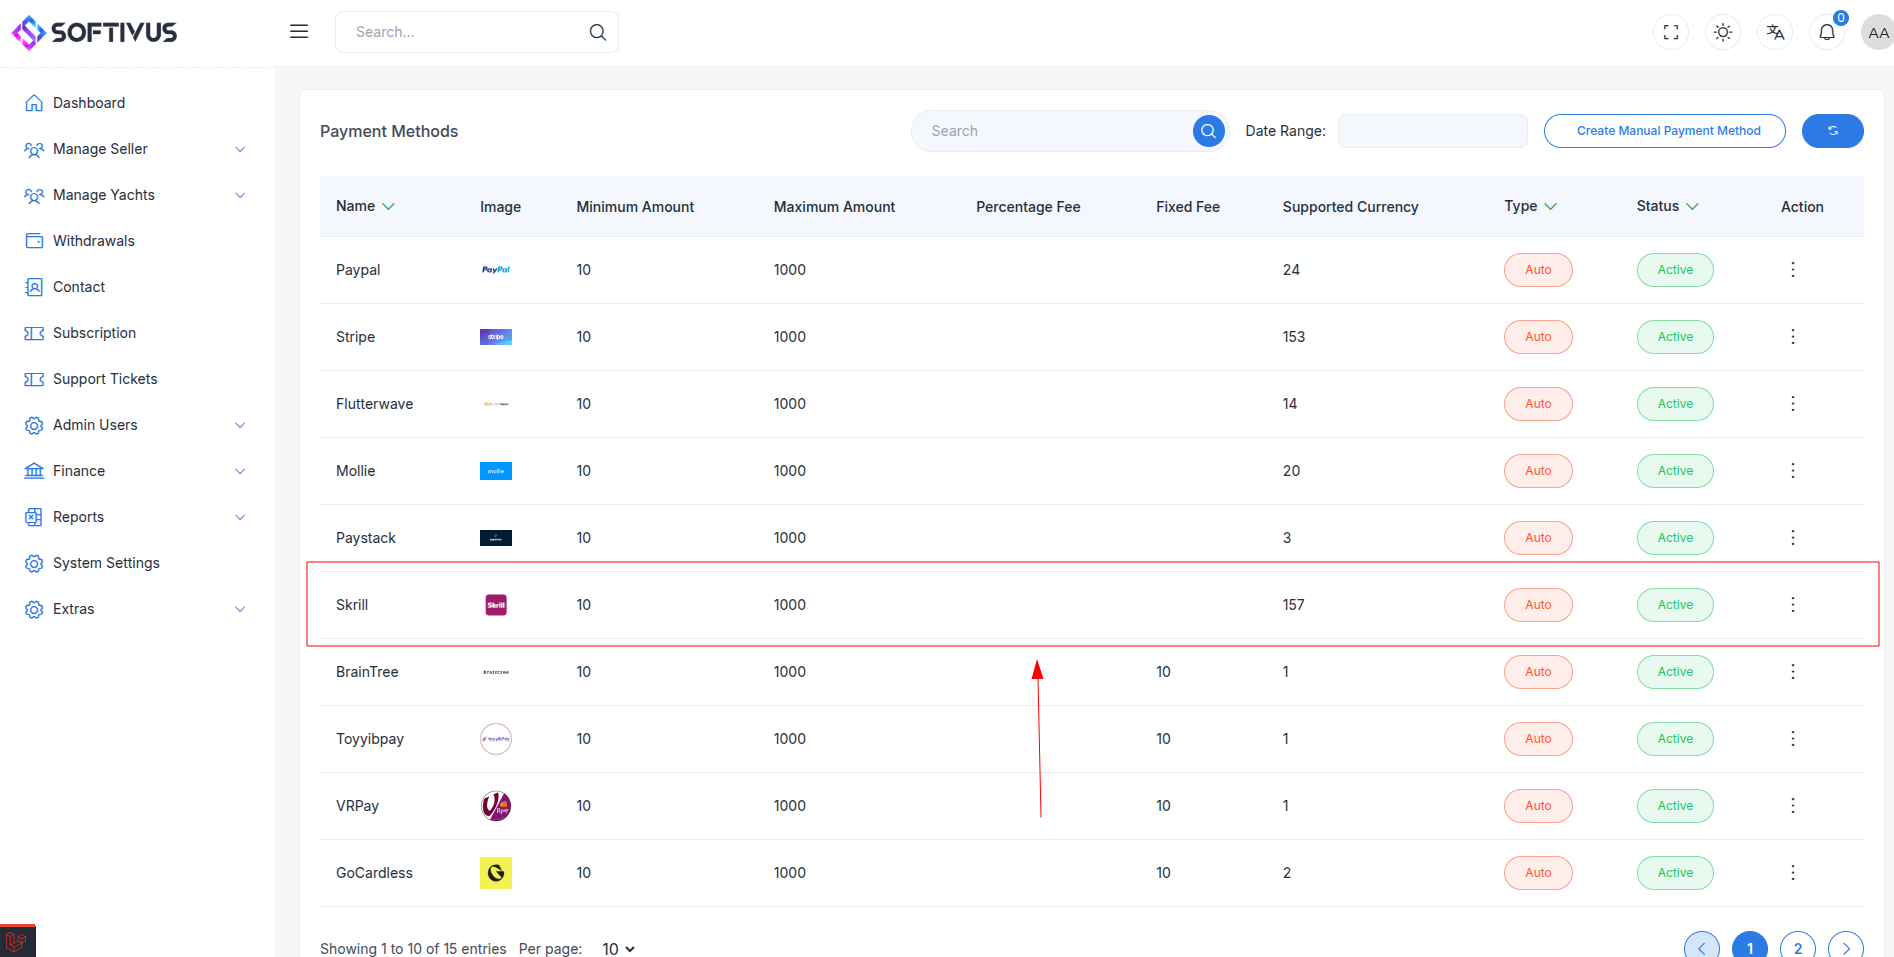
- Navigate to System Settings > Payment Gateways > Skrill.

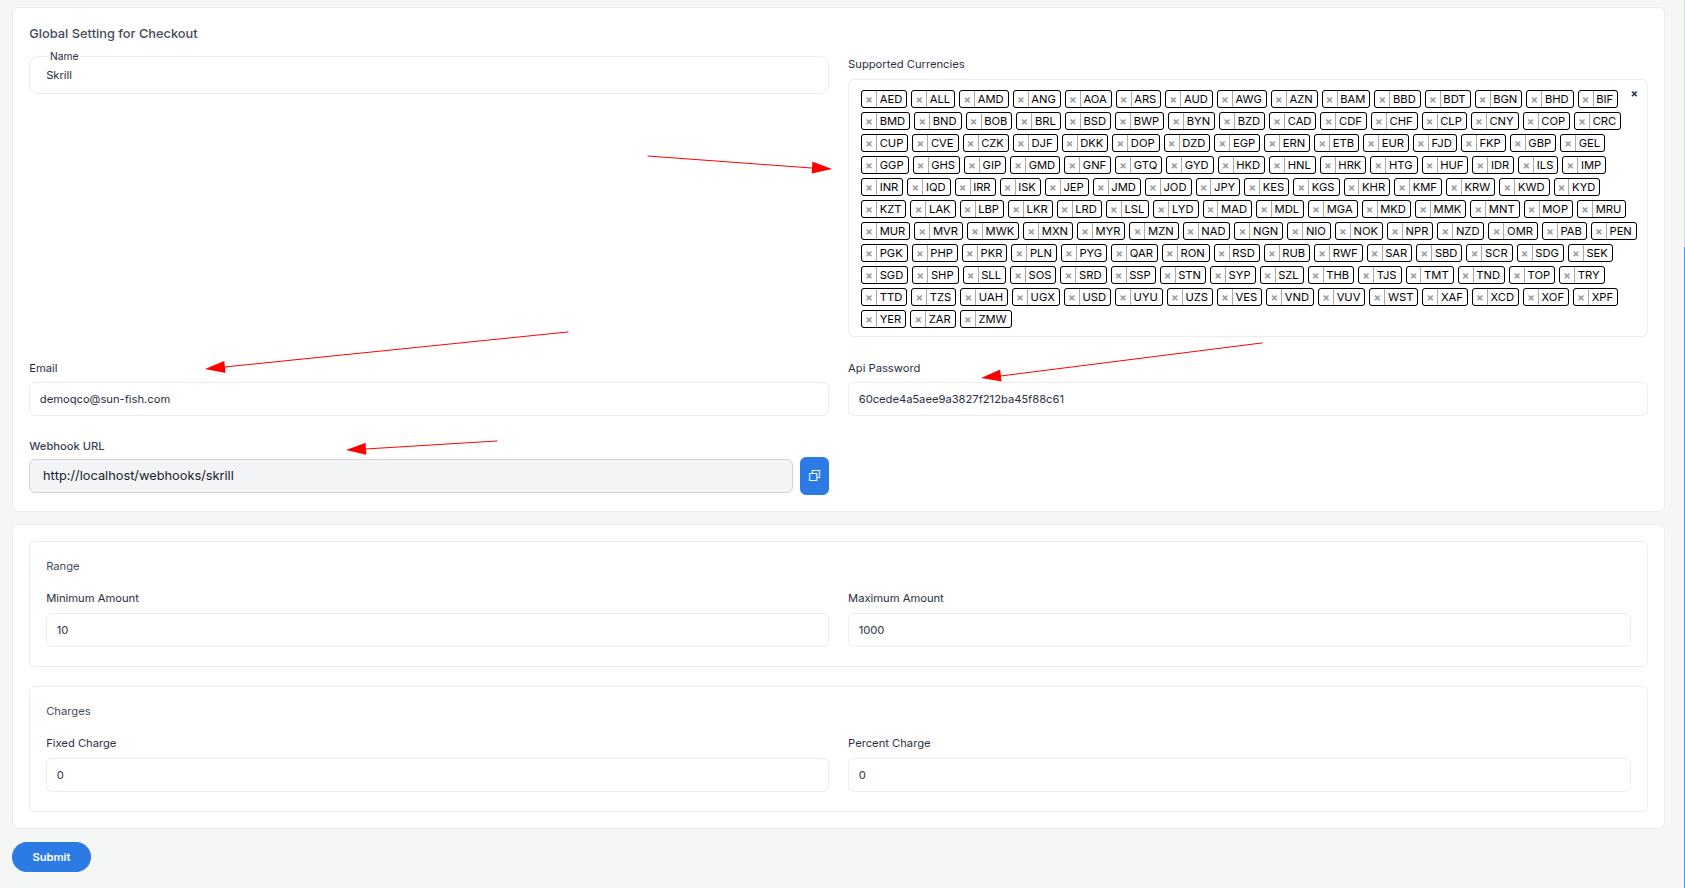
- Fill out the configuration form:

-
Detailed Fields:
- Supported Currencies: Select currencies (e.g., USD, EUR, GBP) enabled on your Skrill account. Request additional currencies via support if needed.
- Active: Toggle “On” to enable Skrill payments.
- Live Mode: Toggle “Off” for testing, “On” for live transactions.
- Merchant Email: Enter your Skrill Merchant Email (e.g.,
merchant@yourbusiness.com). - API/MQI Password: Enter the password set in Developer Settings.
- Secret Word: Enter the secret word you created.
- Webhook URL: Copy this URL and paste it into the Skrill Dashboard’s Status URL field.
- Minimum Amount: Set a floor (e.g., $1.00) to avoid micro-transactions.
- Maximum Amount: Set a ceiling (e.g., $10,000) based on your needs.
- Fixed Charge: Add a flat fee (e.g., $0.50) per transaction, if applicable.
- Percentage Charge: Add a percentage fee (e.g., 2%) on top of Skrill’s fees.
-
Click Submit to save. Your Skrill gateway is now configured.
Step 7: Test the Integration
Test your setup in Test Mode:
- Enable Test Mode:
- In your Admin Panel, ensure Live Mode is off and use test credentials.
- Skrill doesn’t provide separate test keys; use your live Merchant Email with test cards in a sandbox environment.
- Simulate Payments:
- Use Skrill’s test cards:
- Visa:
4000 0012 3456 7890, expiry12/25, CVV123. - MasterCard:
5232 0000 0012 3450, expiry12/25, CVV123.
- Visa:
- Test local methods (e.g., Sofort) with dummy data if enabled.
- Use Skrill’s test cards:
- Verify Webhooks:
- Check your server logs for webhook events (e.g., payment success).
- Ensure payment statuses update in your Admin Panel (e.g., “Paid,” “Failed”).
- Debugging: If payments fail, check the Skrill Dashboard’s Transactions tab for error messages (e.g., “Invalid Card”).
Step 8: Enable Live Mode
After successful testing:
- Skrill Dashboard:
- Ensure your account is verified and ready for live transactions.
- Admin Panel:
- Go to System Settings > Payment Gateways > Skrill.
- Toggle Live Mode to “On”.
- Confirm your Merchant Email, API/MQI Password, and Secret Word are correct (no separate live keys needed).
- Save the changes.
- Webhook Confirmation: Verify the Status URL is still set correctly in the Skrill Dashboard.
Step 9: Go Live
Launch your Skrill integration:
- Start Accepting Payments:
- Customers can now pay using enabled methods at checkout.
- Monitor initial transactions for any issues.
- Live Verification:
- In the Skrill Dashboard, go to Transactions to track payments in real-time.
- Confirm payouts to your bank account (weekly or monthly, depending on settings).
- Troubleshooting:
- If payments fail, review error logs in the Skrill Dashboard or contact support@skrill.com.
- Ensure your webhook endpoint remains operational.
Additional Tips
- Skrill Fees: Skrill charges per transaction (e.g., 1.9% + €0.29 for new merchants). Review pricing and adjust your charges accordingly.
- Documentation: Check the Skrill Integration Guide for advanced features like Quick Checkout or refunds.
- Support: Reach out to Skrill via support@skrill.com or the Dashboard’s live chat for help.
Note:
If you encounter issues or need further assistance, our support team is here to help. Contact us at softivus@gmail.com or through the Admin Panel. Let’s make your Skrill integration a success!